yicestmoi [Y&P] yi 'n phie team
France
Member
Membro dal Dec 2004
Ultimo accesso 2026-02-24
Gran Turismo 2
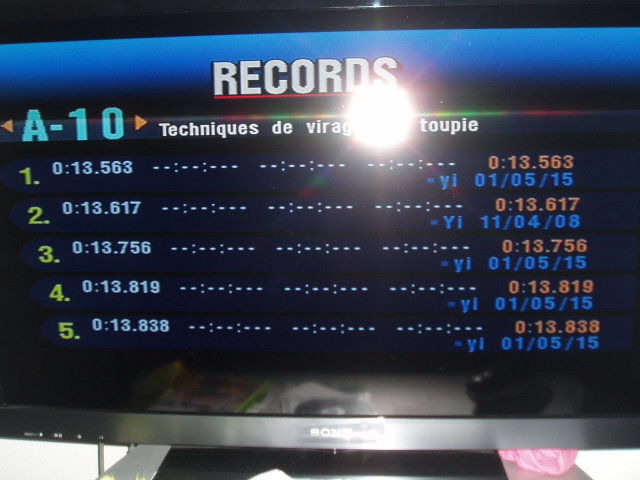
A10: Applied Cornering 4
Score: 13563
Rank: 6
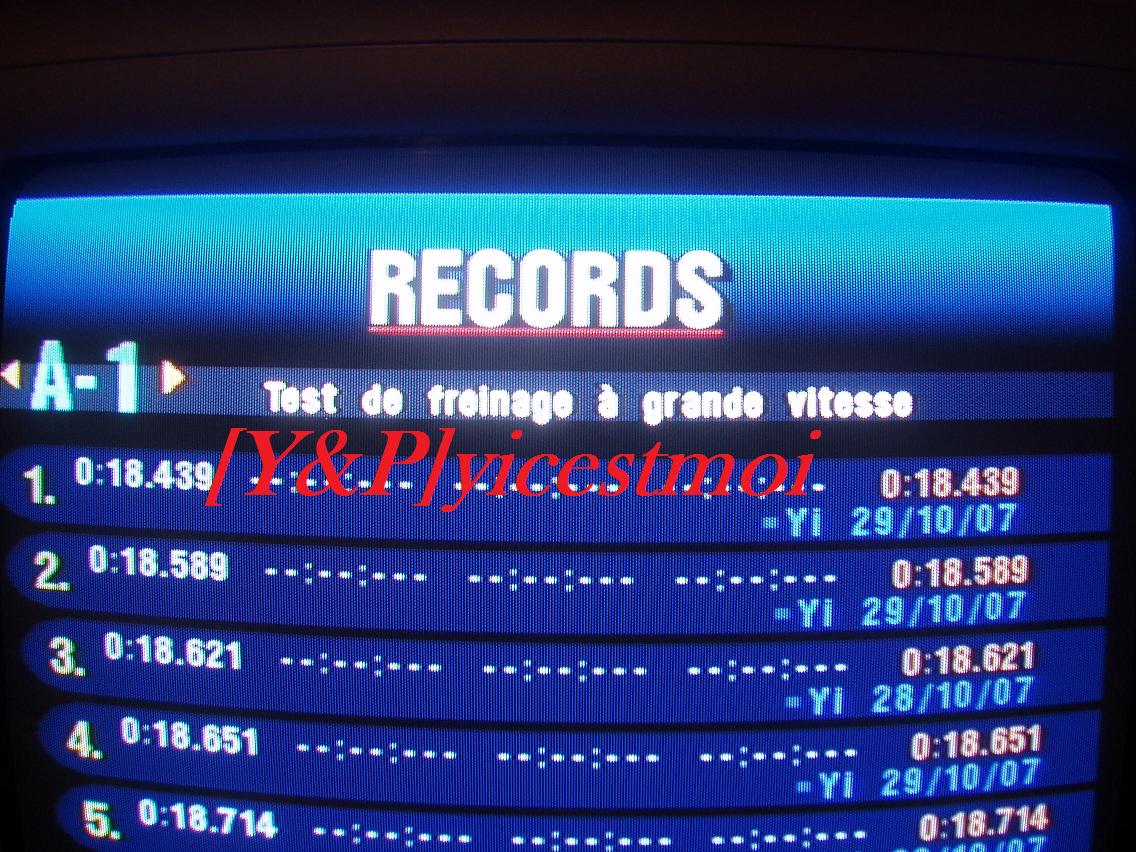
A1: High Speed Braking
Score: 18439
Rank: 1
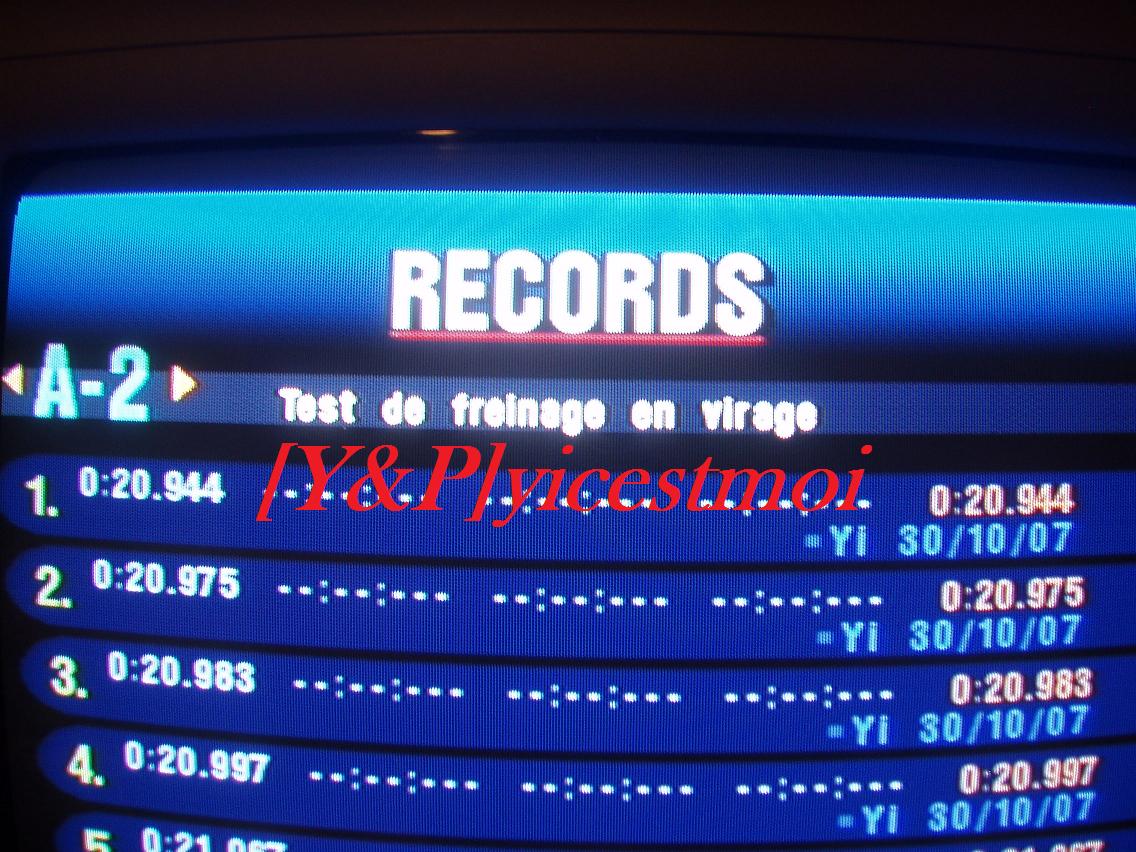
A2: Cornering & Braking
Score: 20944
Rank: 5
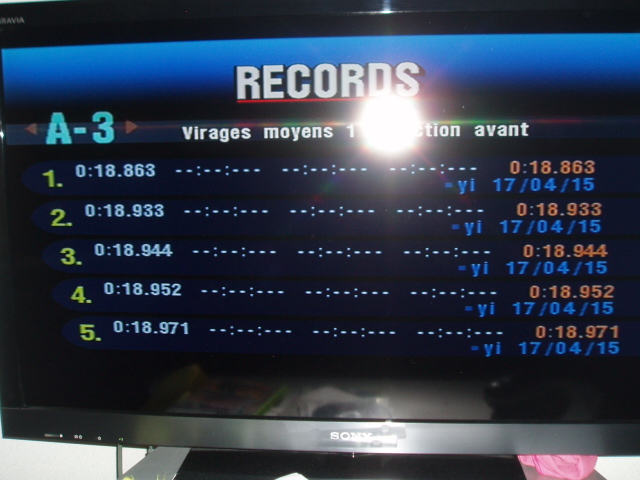
A3: Intermediate Cornering 1
Score: 18863
Rank: 3
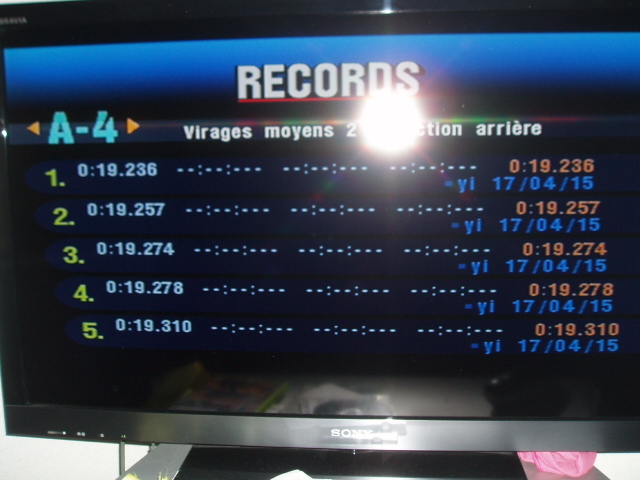
A4: Intermediate Cornering 2
Score: 19236
Rank: 3
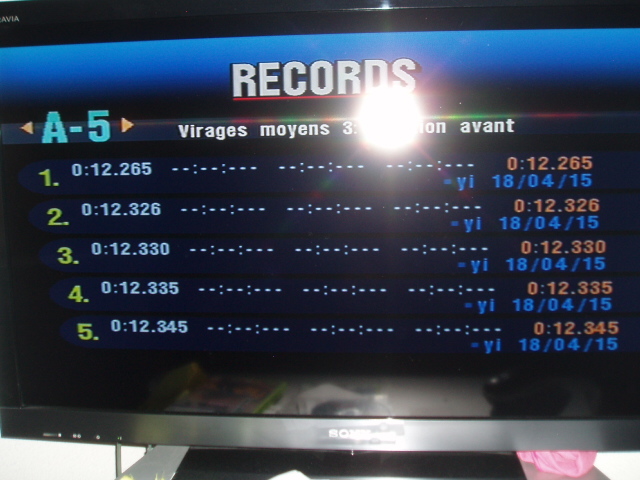
A5: Intermediate Cornering 3
Score: 12265
Rank: 5
A6: Intermediate Cornering 4
Score: 12320
Rank: 6

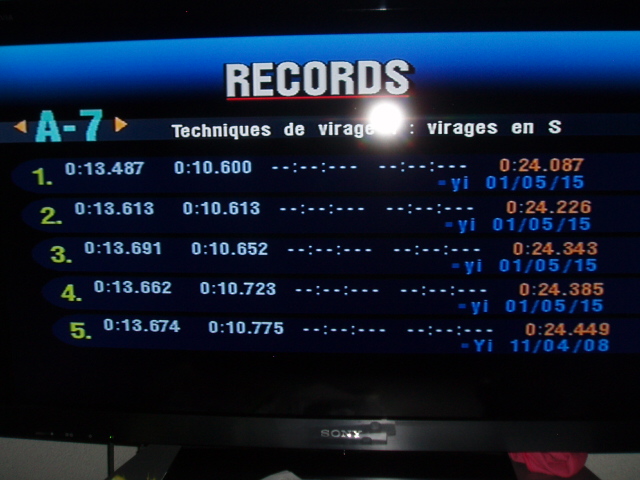
A7: Applied Cornering 1
Score: 24087
Rank: 2
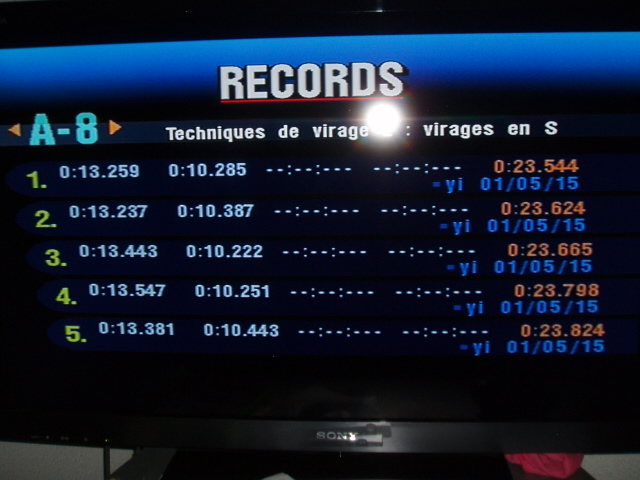
A8: Applied Cornering 2
Score: 23544
Rank: 2
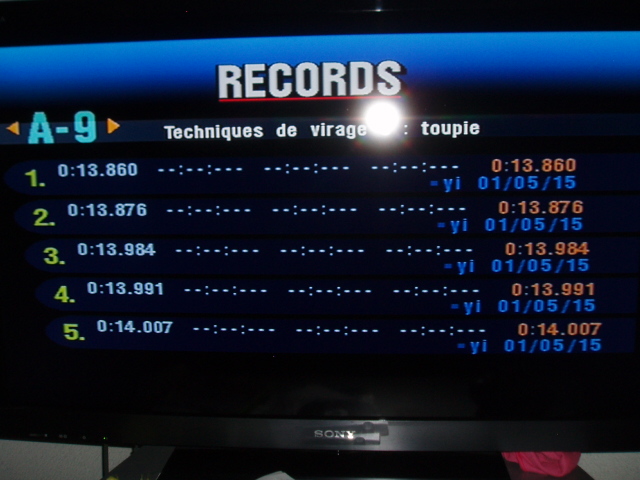
A9: Applied Cornering 3
Score: 13860
Rank: 5
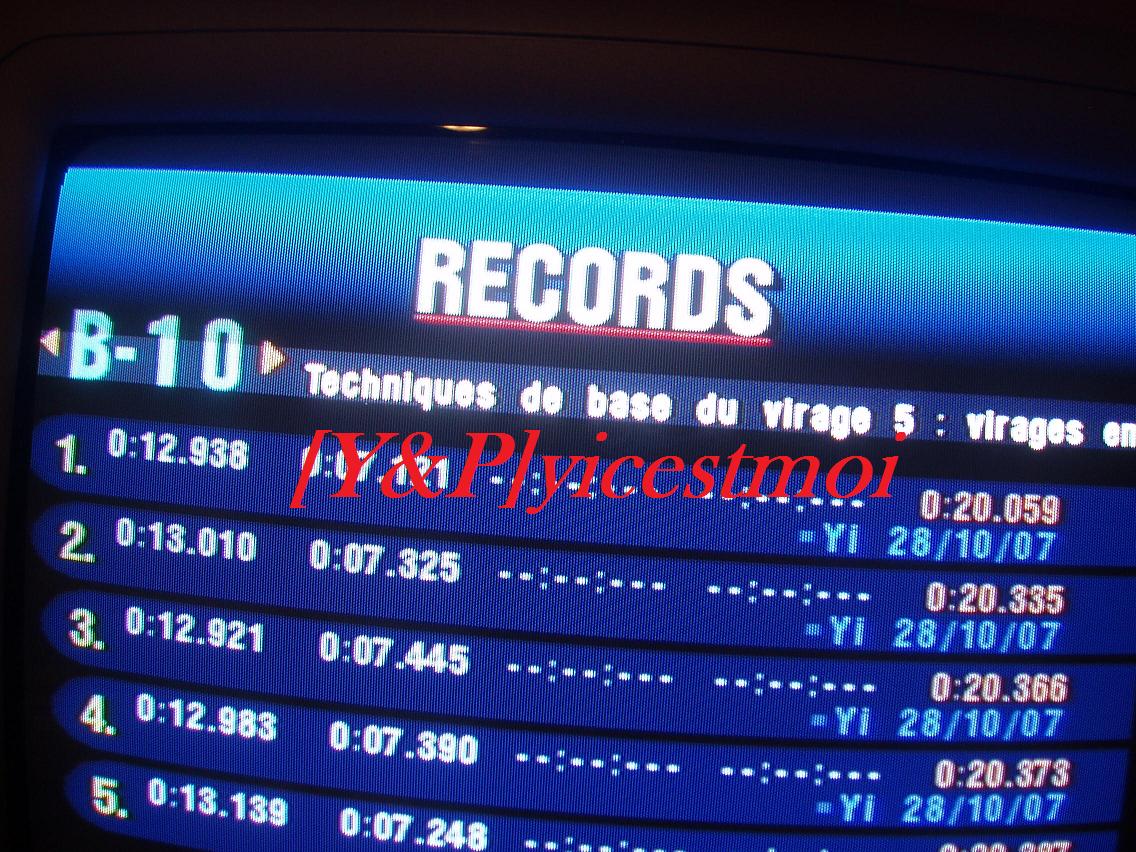
B10: Basics of Cornering 5
Score: 20059
Rank: 8
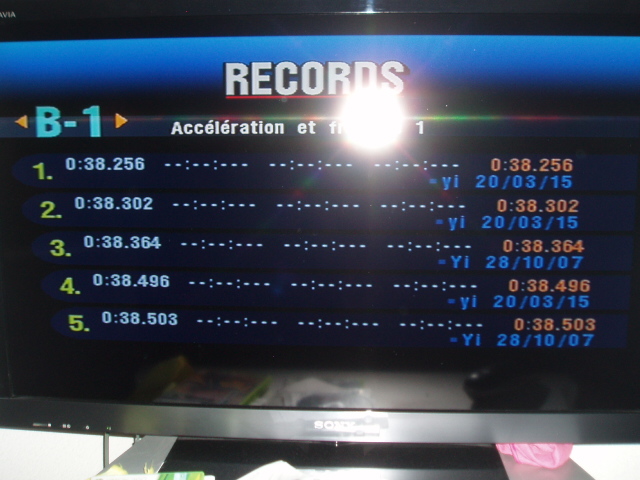
B1: Start, Acceleration, and Braking 1
Score: 38256
Rank: 4
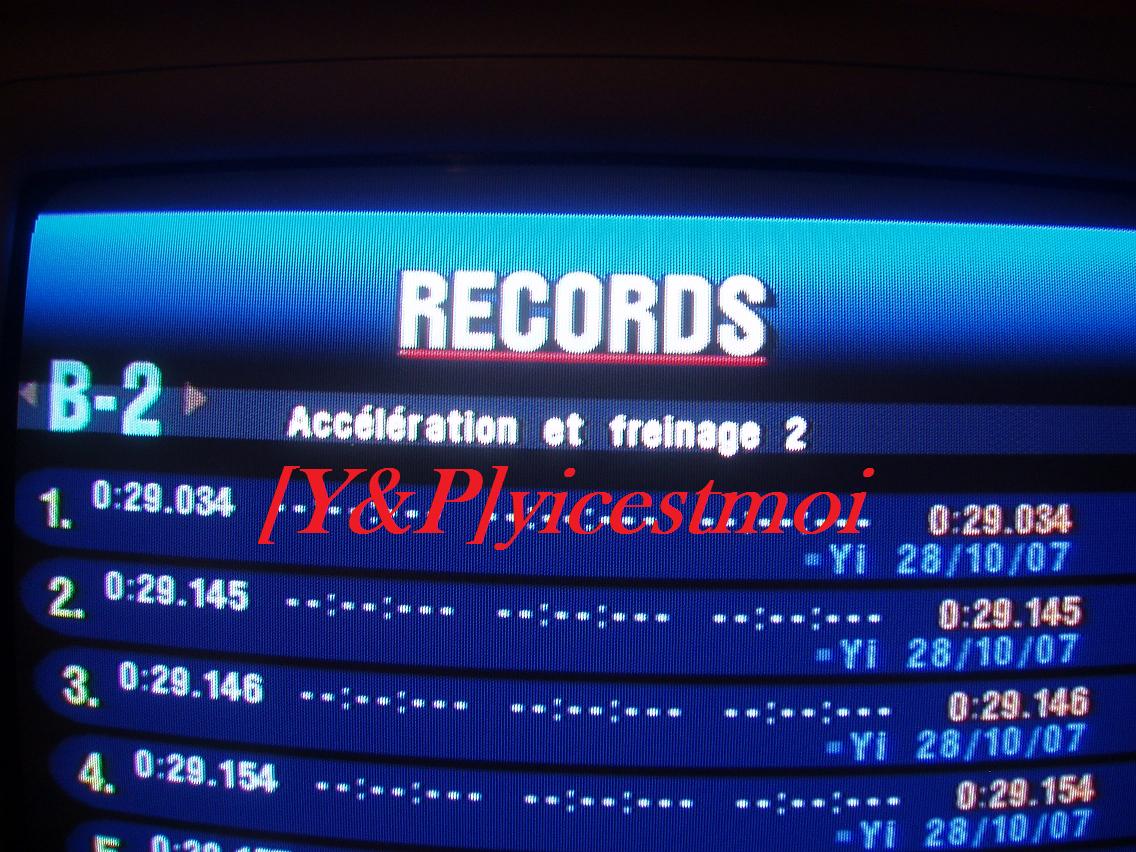
B2: Start, Acceleration, and Braking 2
Score: 29034
Rank: 1
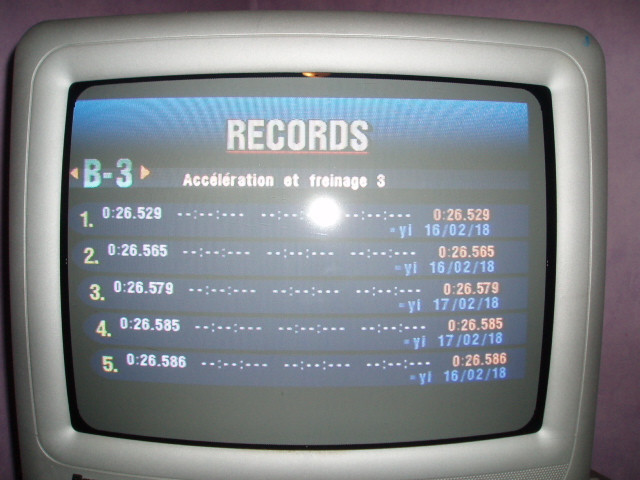
B3: Start, Acceleration, and Braking 3
Score: 26529
Rank: 4
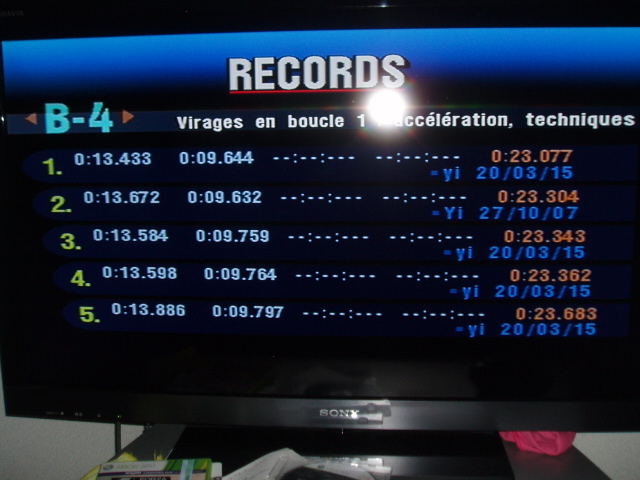
B4: Acceleration Basics
Score: 23077
Rank: 1
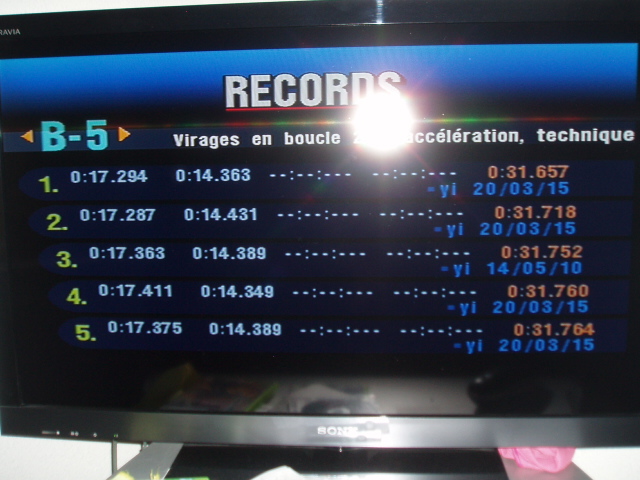
B5: Acceleration Basics
Score: 31657
Rank: 3
B6: Basics of Cornering 1
Score: 24184
Rank: 3

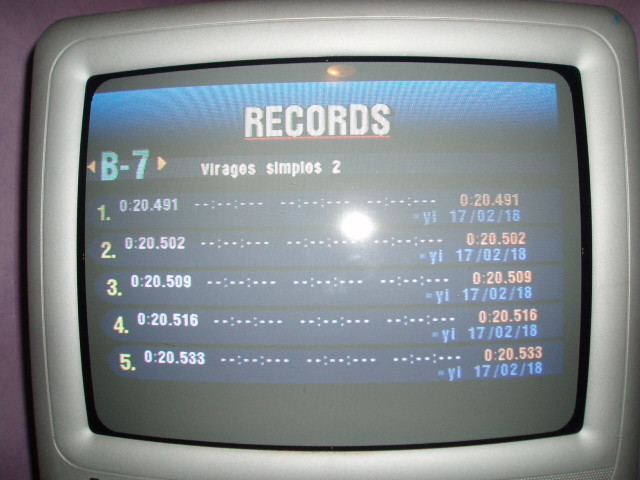
B7: Basics of Cornering 2
Score: 20491
Rank: 4
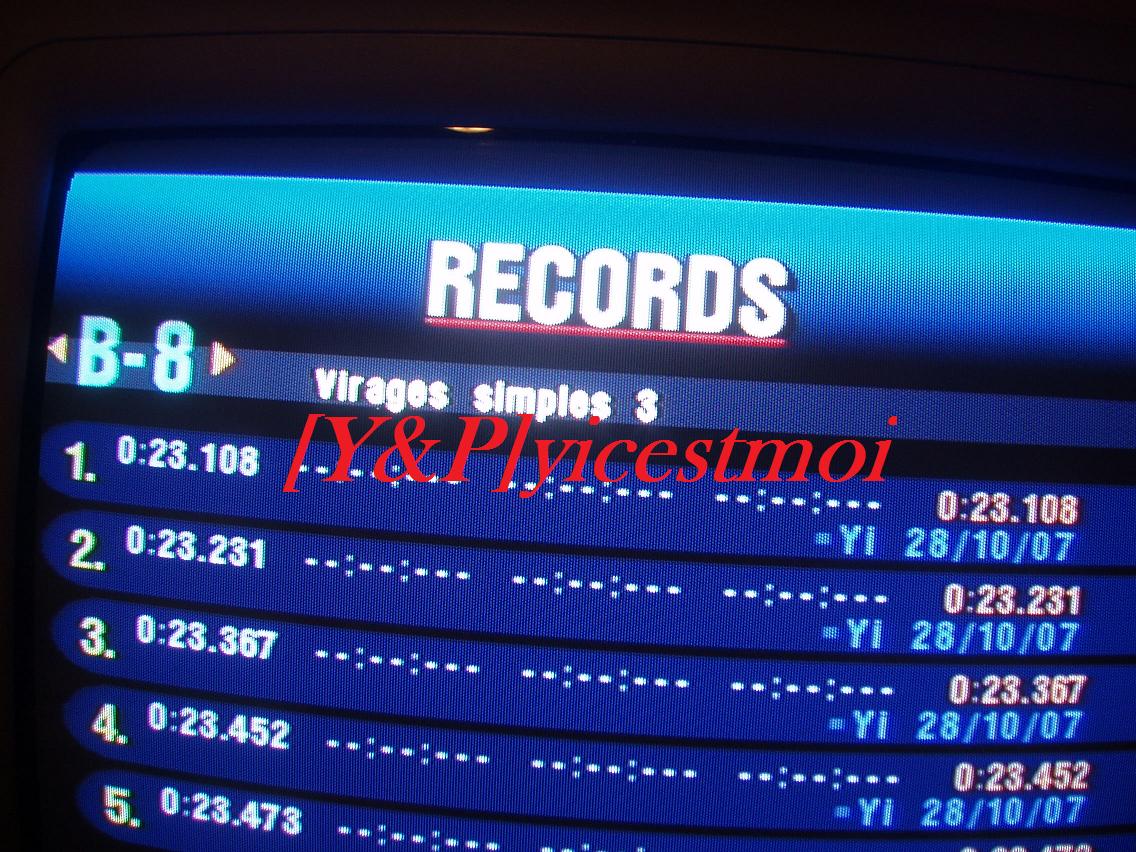
B8: Basics of Cornering 3
Score: 23108
Rank: 5
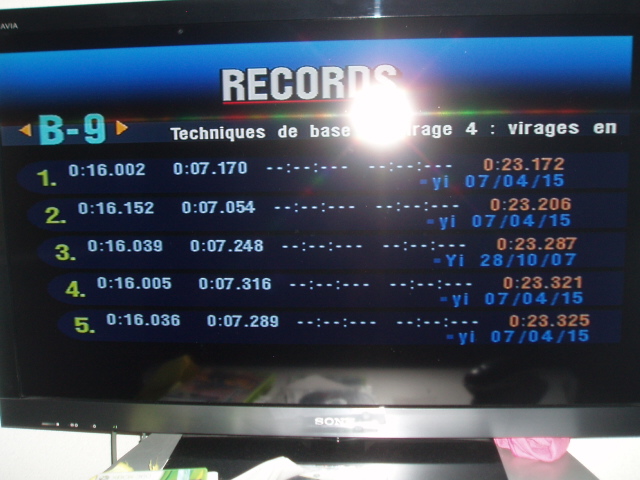
B9: Basics of Cornering 4
Score: 23172
Rank: 6
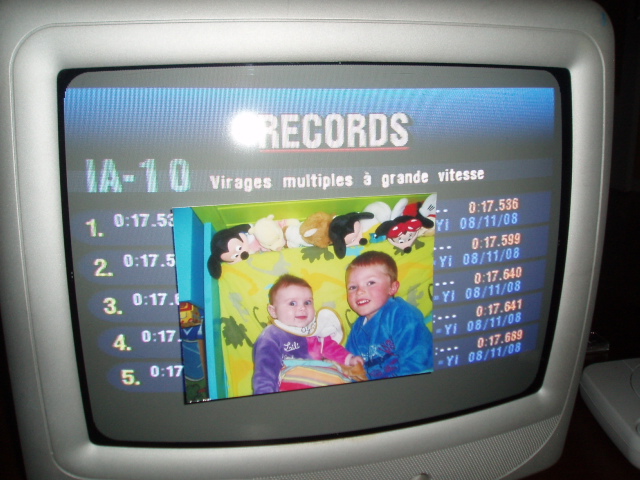
IA10: Ultra High-Speed Multiple corners
Score: 17536
Rank: 8
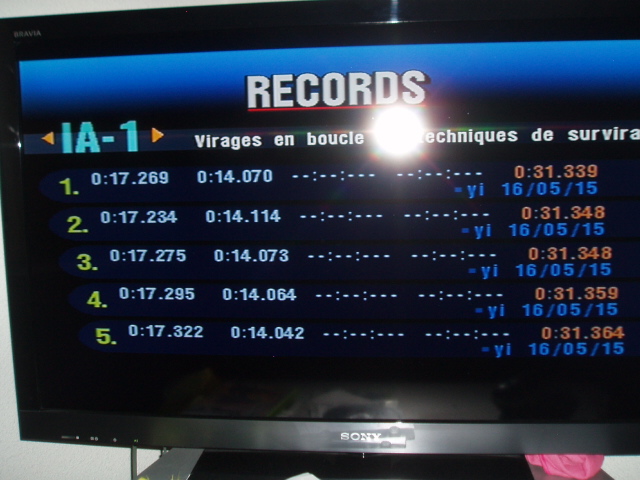
IA1: Circular Turns 3: Oversteer Practice
Score: 31339
Rank: 3
IA2: Ultra High-Speed Multiple corners
Score: 23563
Rank: 8

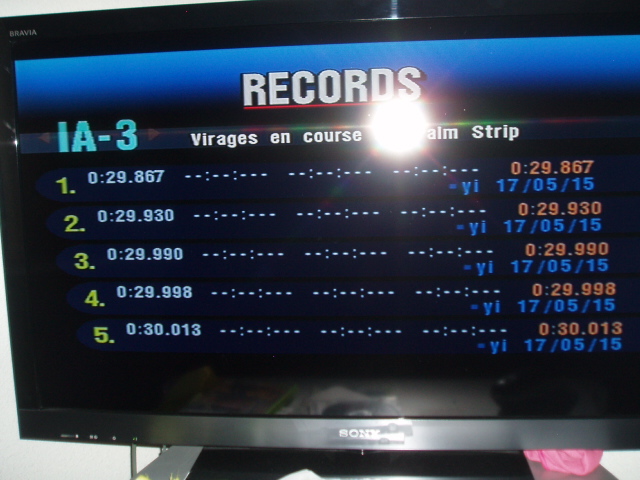
IA3: Race Cornering 9: Palm Strip
Score: 29867
Rank: 4
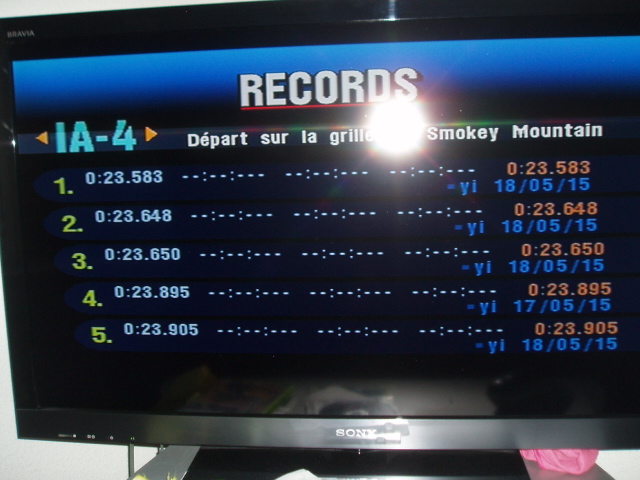
IA4: Starting Grid Practice 3: Smokey Mountain
Score: 23583
Rank: 3
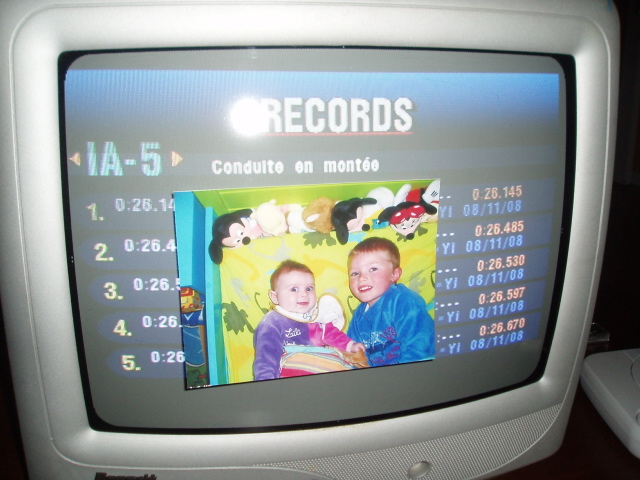
IA5: Hill Climb Techniques
Score: 26145
Rank: 6
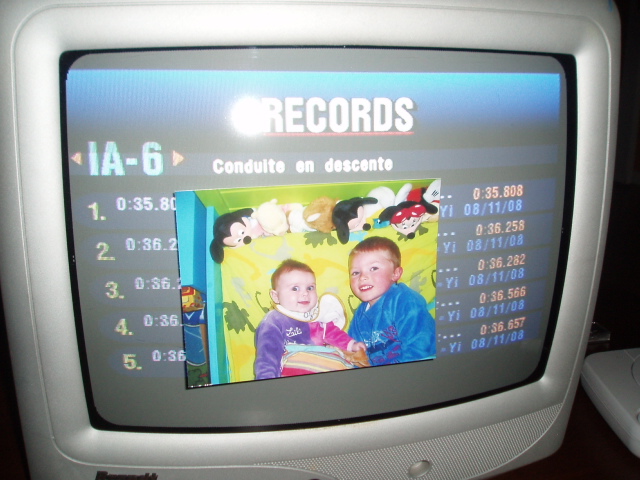
IA6: Downhill Techniques
Score: 35808
Rank: 4
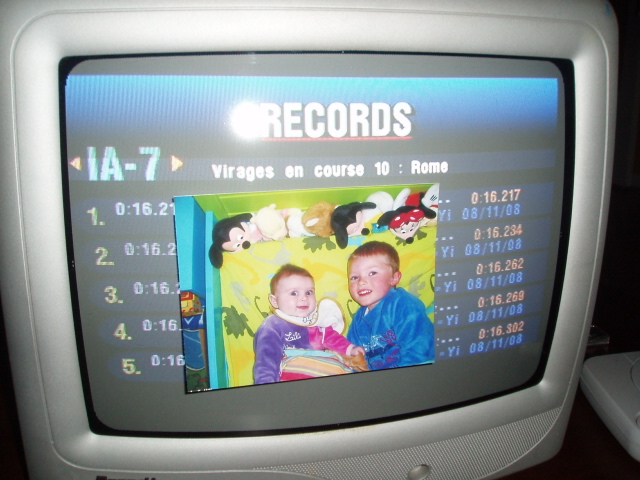
IA7: Race Cornering 10: Rome
Score: 16217
Rank: 8
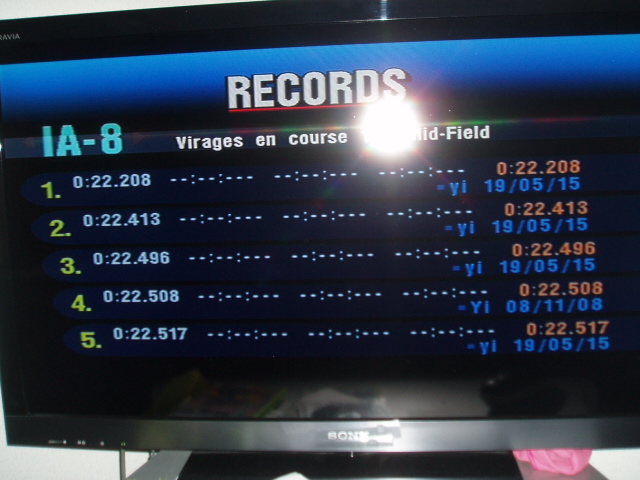
IA8: Race Cornering 11: Mid-Field
Score: 22208
Rank: 3
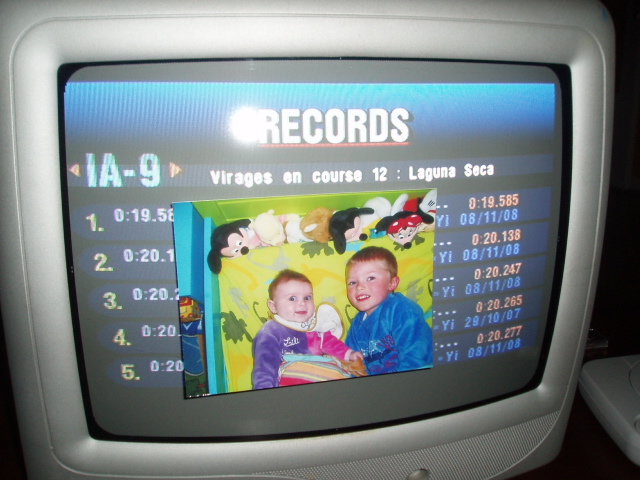
IA9: Race Cornering 12: Laguna Seca
Score: 19585
Rank: 5
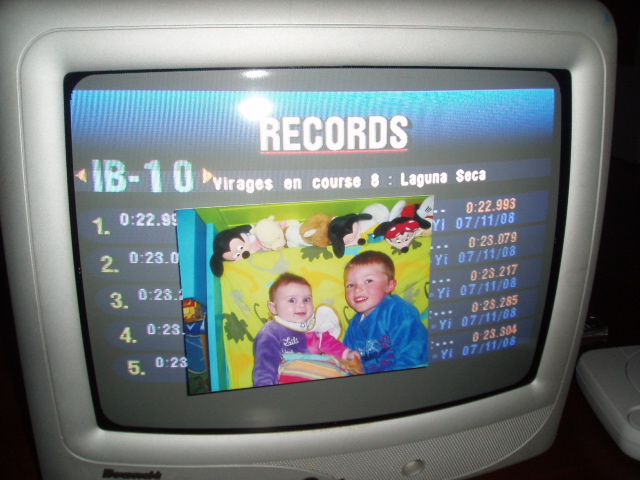
IB10: Race Cornering 8: Laguna Seca
Score: 22993
Rank: 6
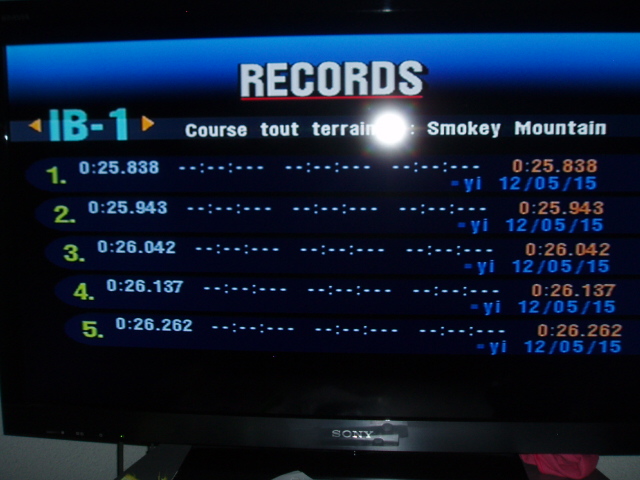
IB1: Dirt Course Practice 1: Smokey Mountain
Score: 25838
Rank: 6
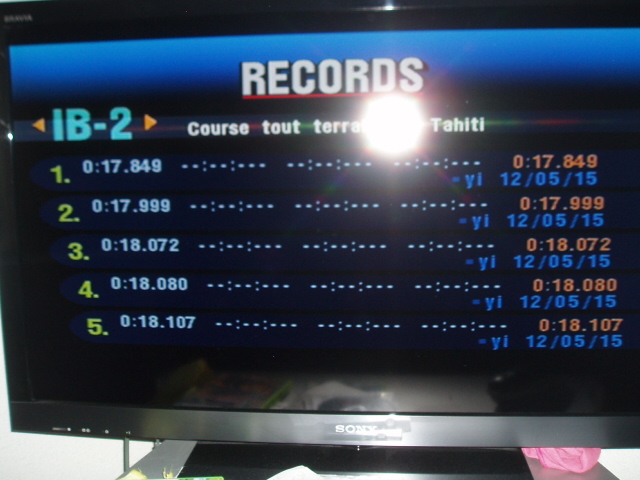
IB2: Dirt Course Practice 2: Tahiti
Score: 17849
Rank: 5
IB3: Oversteer Practice 1: FWD
Score: 25027
Rank: 3

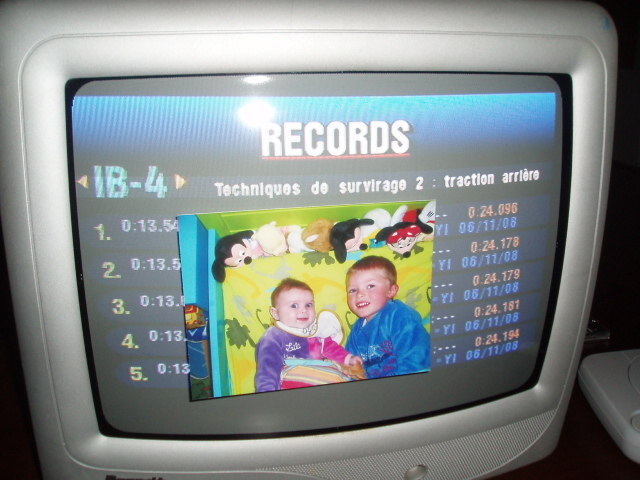
IB4: Oversteer Practice 1: RWD
Score: 24096
Rank: 8
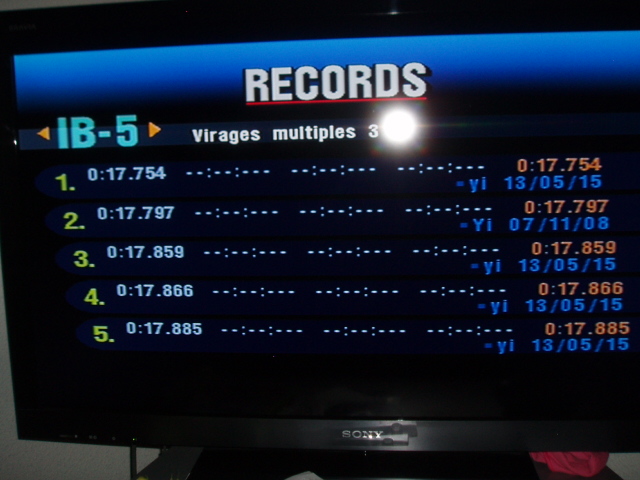
IB5: Multiple Corner Practice 3
Score: 17754
Rank: 4
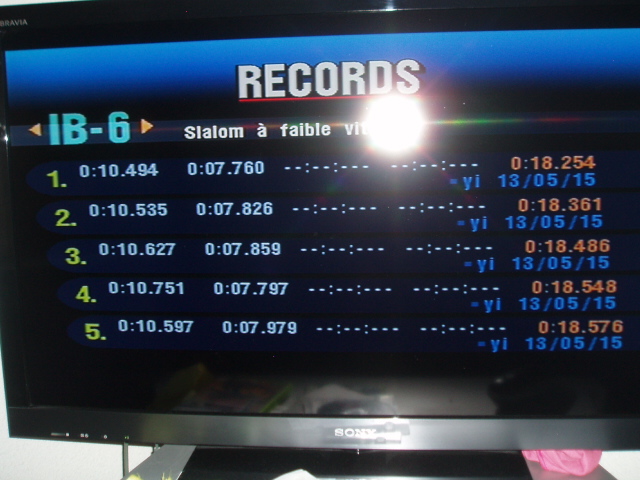
IB6: Slow Speed Slalom
Score: 18254
Rank: 2
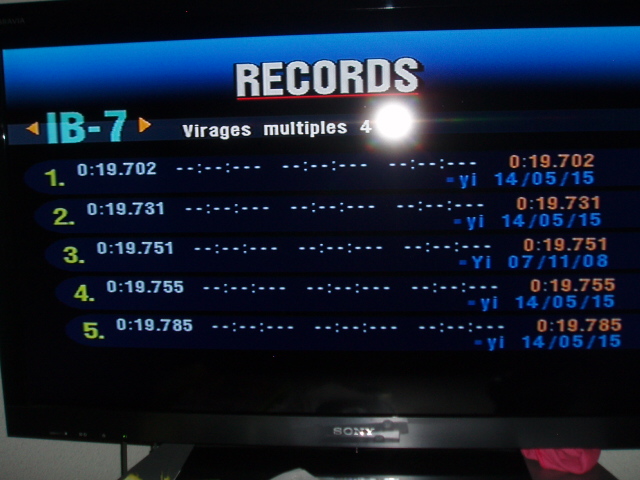
IB7: Multiple Corner Practice 4
Score: 19702
Rank: 2
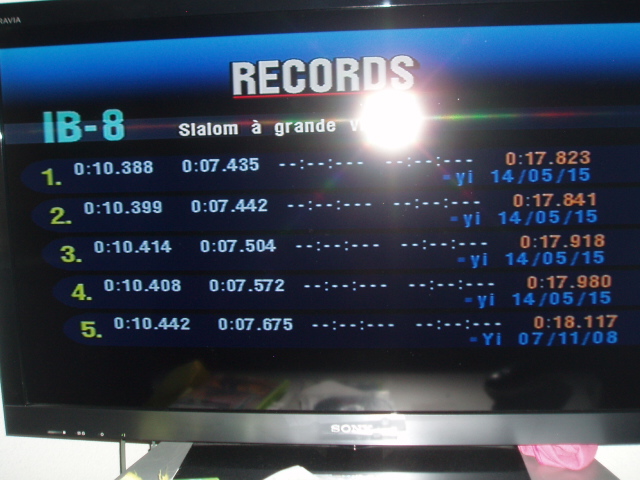
IB8: High Speed Slalom
Score: 17823
Rank: 3
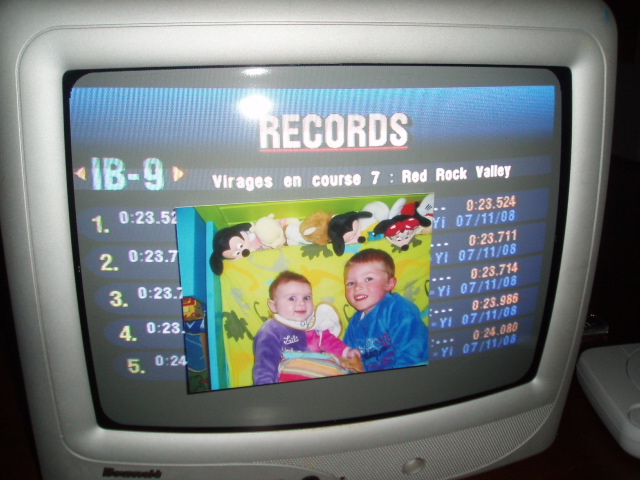
IB9: Race Cornering 7: Red Rock Valley
Score: 23524
Rank: 2
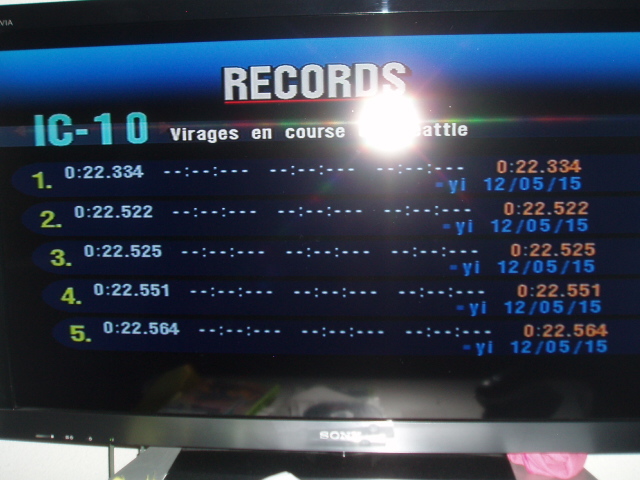
IC10: Race Cornering 6: Seattle
Score: 22334
Rank: 4
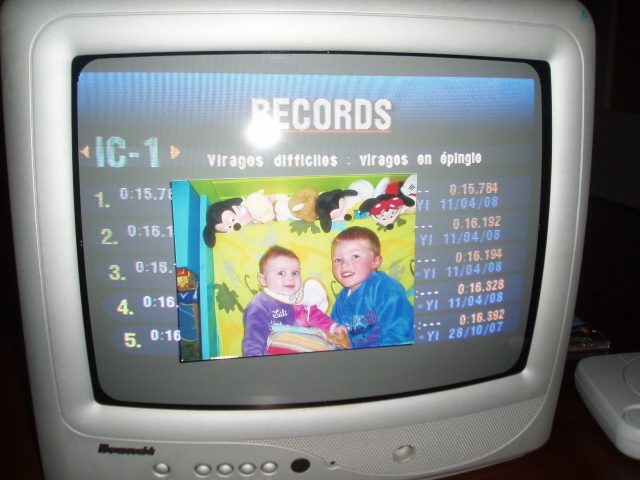
IC1: Advance Cornering: J-Turns
Score: 15784
Rank: 3
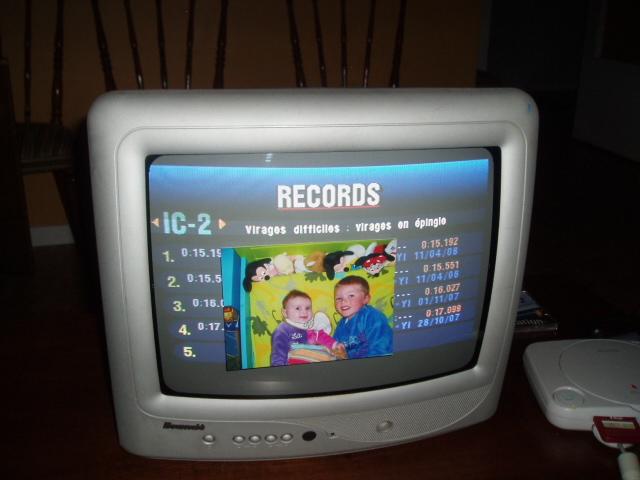
IC2: Advance Cornering: J-Turns
Score: 15192
Rank: 3
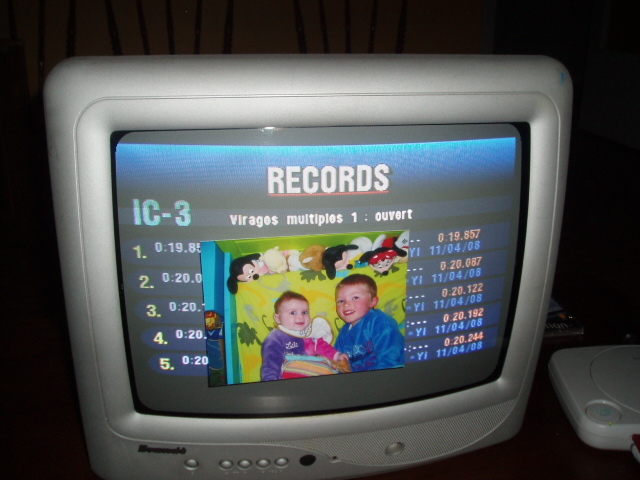
IC3: Multiple Corner Practice 1: Open
Score: 19857
Rank: 3
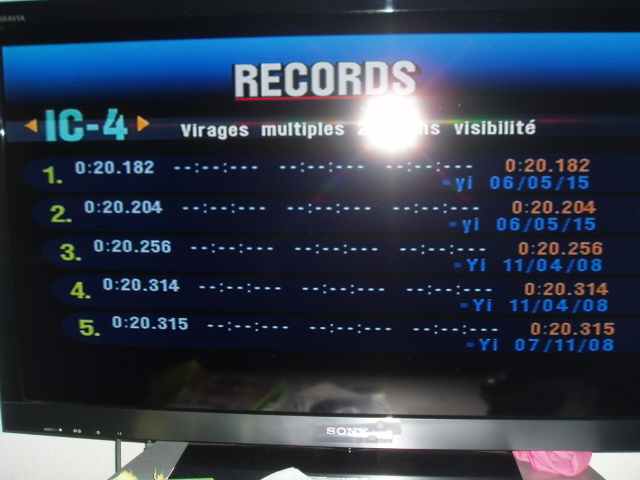
IC4: Multiple Corner Practice 2: Blind
Score: 20182
Rank: 7
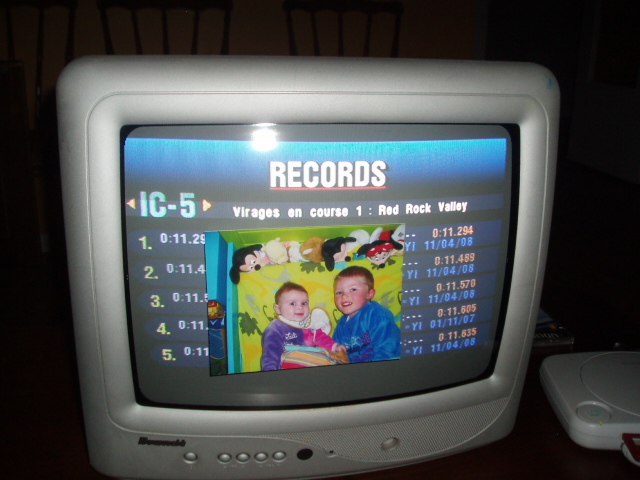
IC5: Race Cornering 1: Red Rock Valley
Score: 11294
Rank: 4
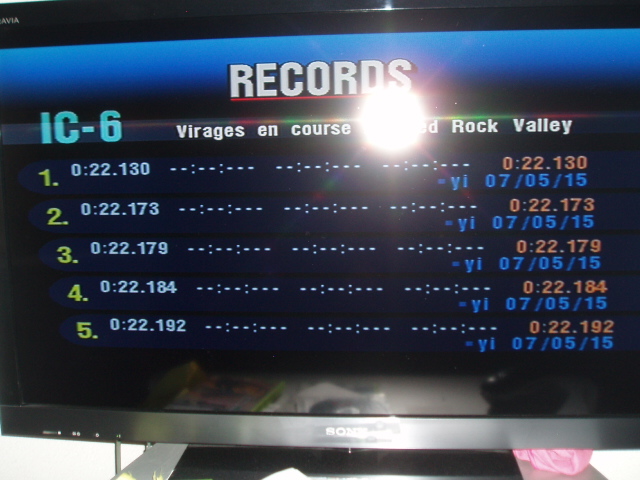
IC6: Race Cornering 2: Red Rock Valley
Score: 22130
Rank: 5
IC7: Race Cornering 3: Midfield
Score: 14941
Rank: 5
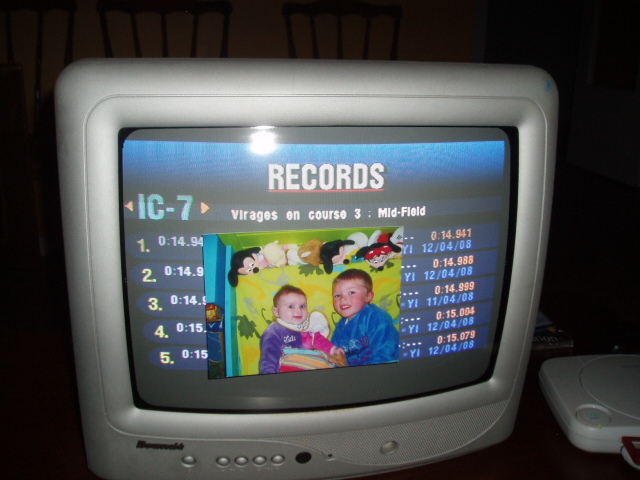
IC8: Race Cornering 4: Midfield
Score: 14494
Rank: 4

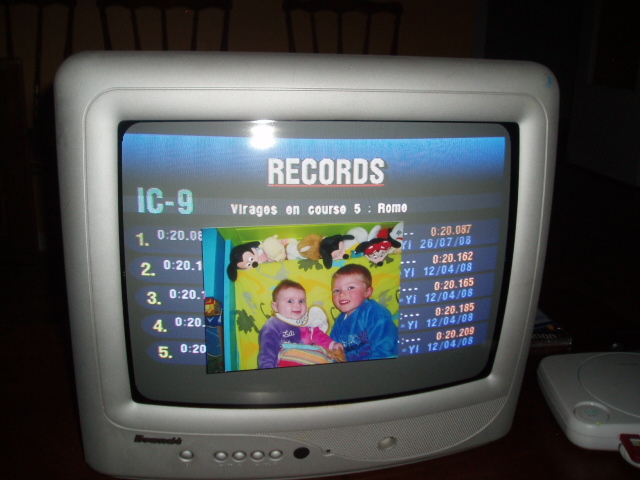
IC9: Race Cornering 5: Rome
Score: 20087
Rank: 5
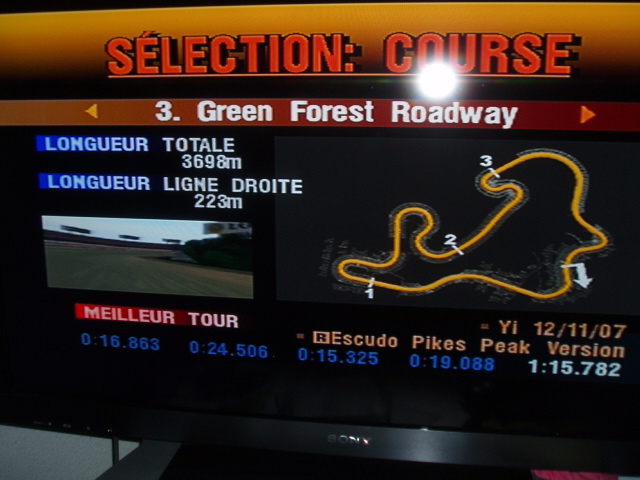
Green Forest Roadway
Score: 115782
Rank: 5
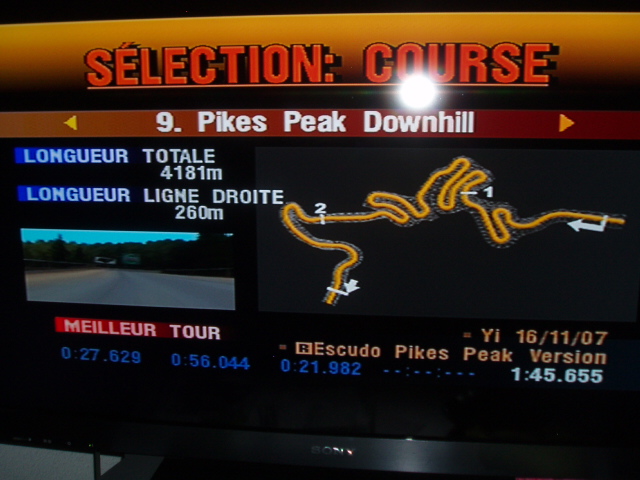
Pikes Peak Downhill
Score: 145655
Rank: 5
Pikes Peak Hill Climb
Score: 143502
Rank: 5

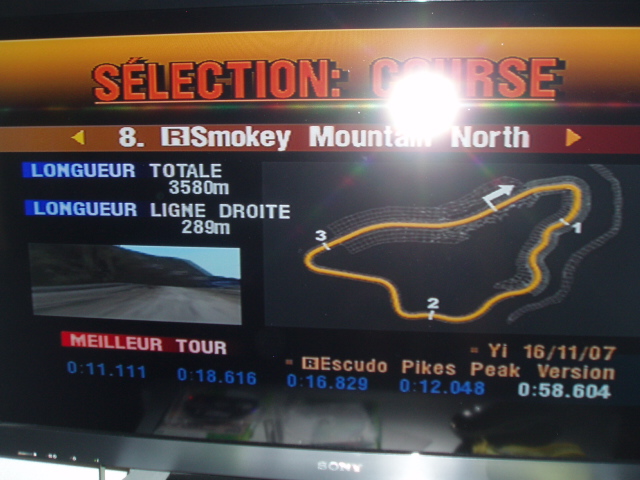
Smokey Mountain North
Score: 57019
Rank: 5

Smokey Mountain North: Reverse
Score: 58604
Rank: 5
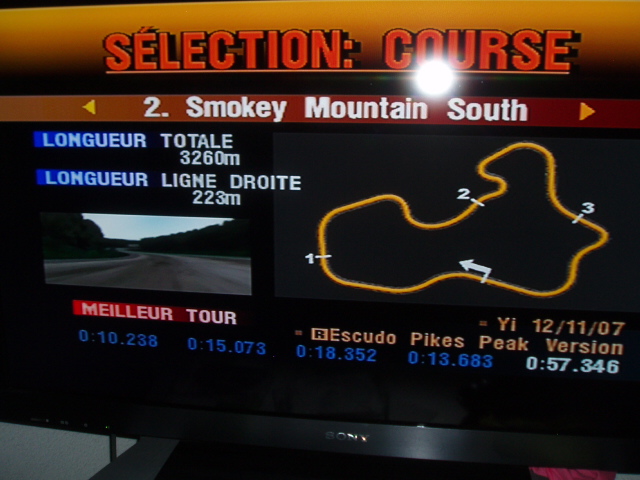
Smokey Mountain South
Score: 57346
Rank: 5
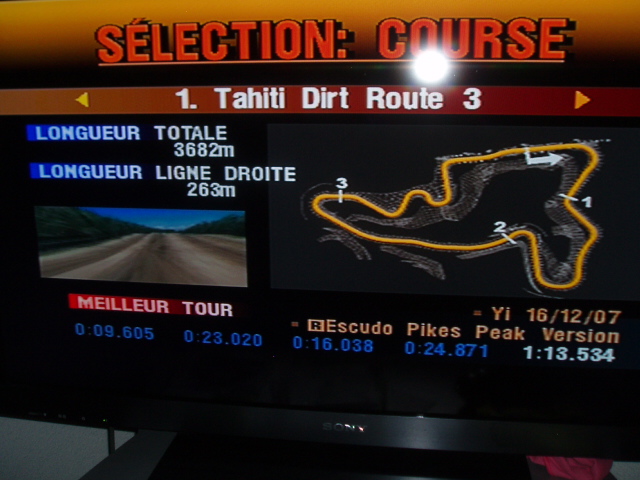
Tahiti Dirt Road 3: Reverse
Score: 113689
Rank: 3
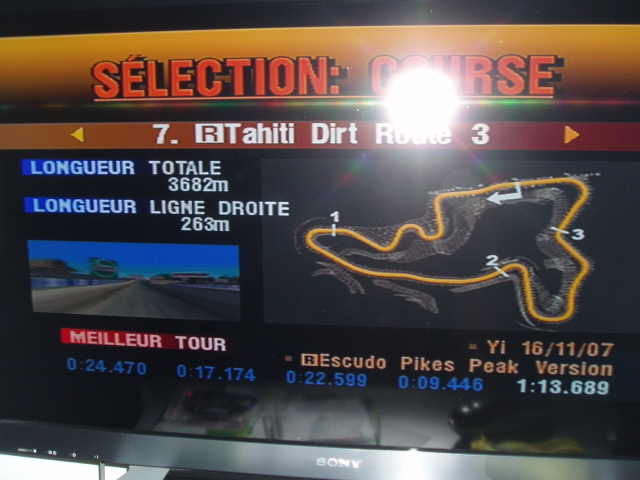
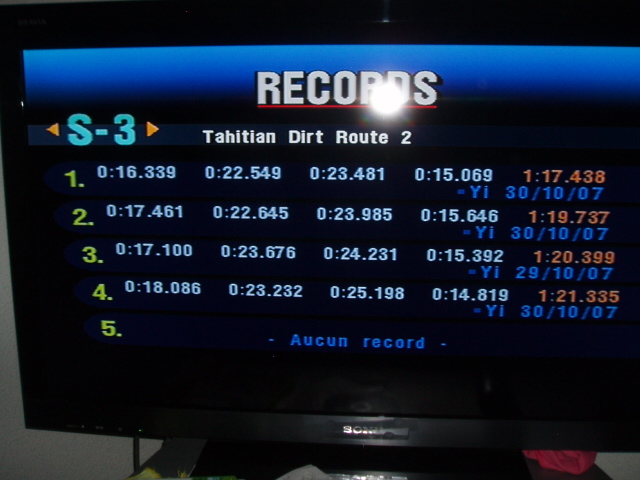
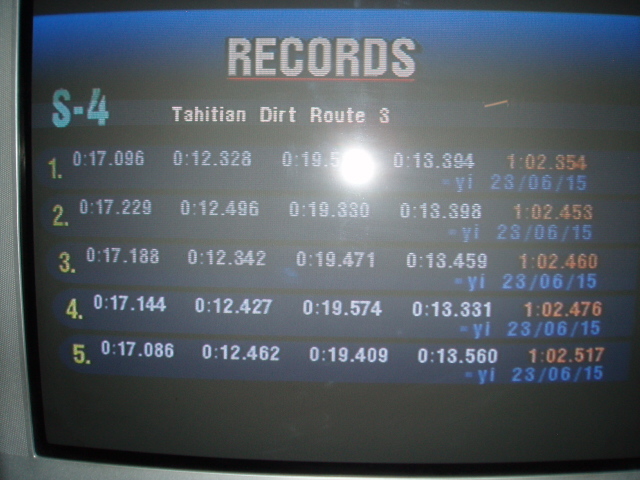
Tahiti Dirt Route 3
Score: 113534
Rank: 6
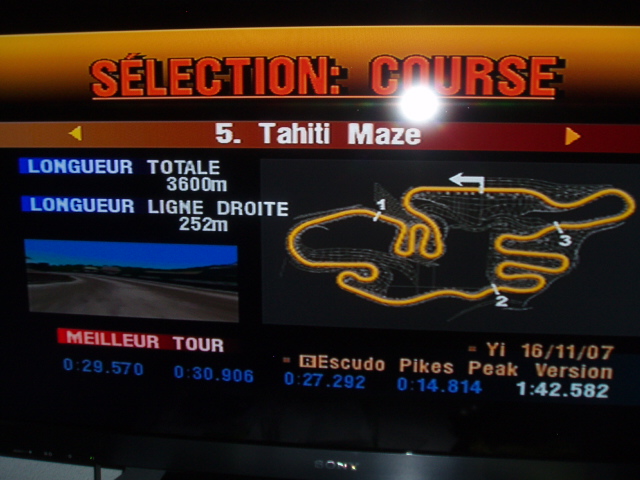
Tahiti Maze
Score: 142582
Rank: 7
S10: Apricot Hill
Score: 107854
Rank: 2

S1: Tahiti Road
Score: 112733
Rank: 9
S2: Seattle City Course
Score: 130894
Rank: 8
S3: Smokey Mountain North
Score: 117438
Rank: 4
S4: Mid-Field Raceway
Score: 102354
Rank: 2
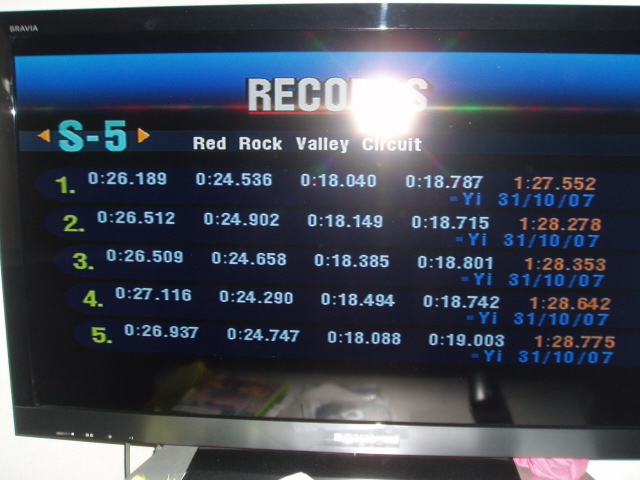
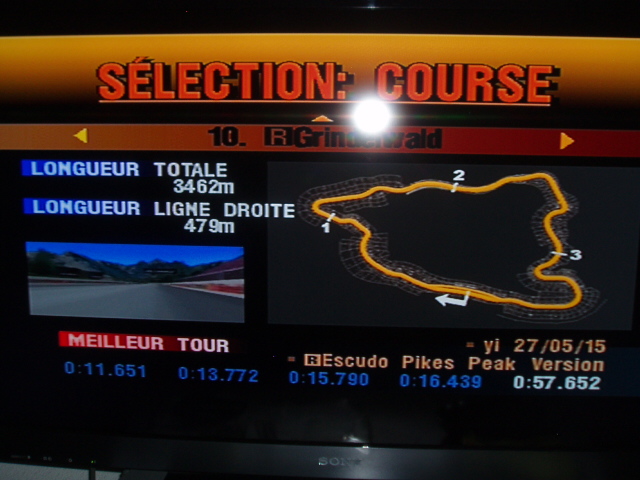
S5: Grindelawd
Score: 127552
Rank: 8
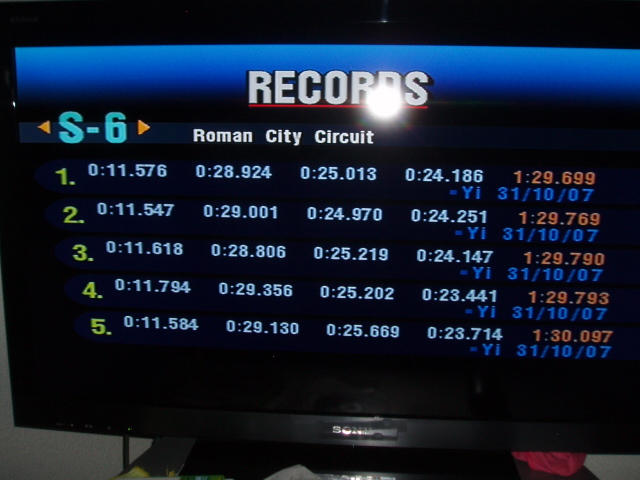
S6: Rome City Course
Score: 129699
Rank: 7
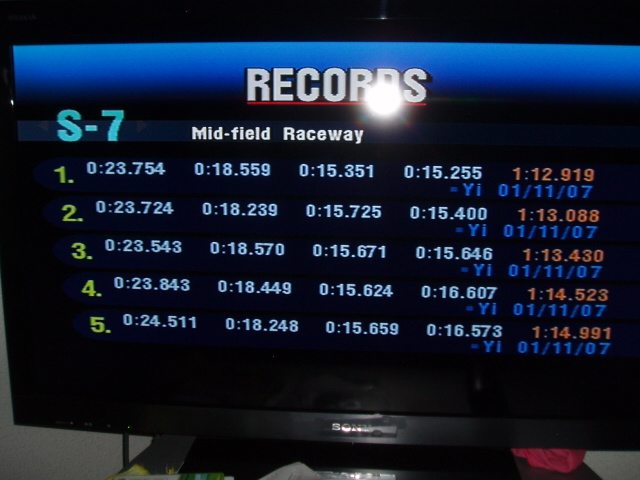
S7: Laguna Seca Speedway
Score: 112919
Rank: 6
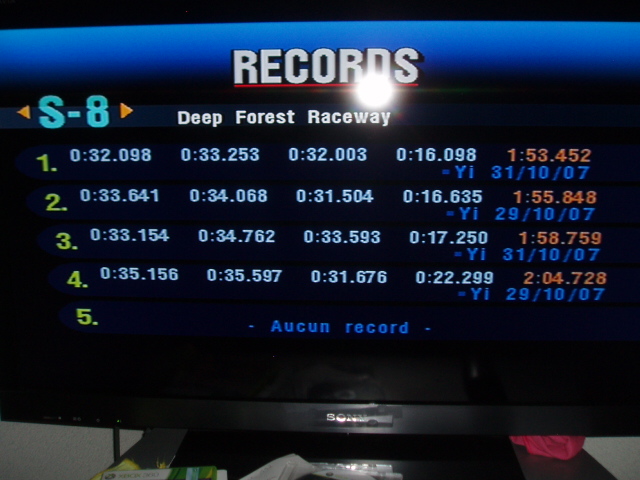
S8: Tahiti Maze
Score: 153452
Rank: 4
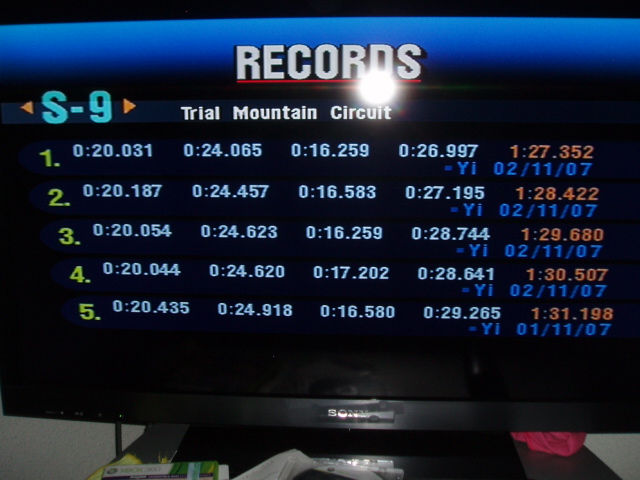
S9: Rome Night Course
Score: 127352
Rank: 4
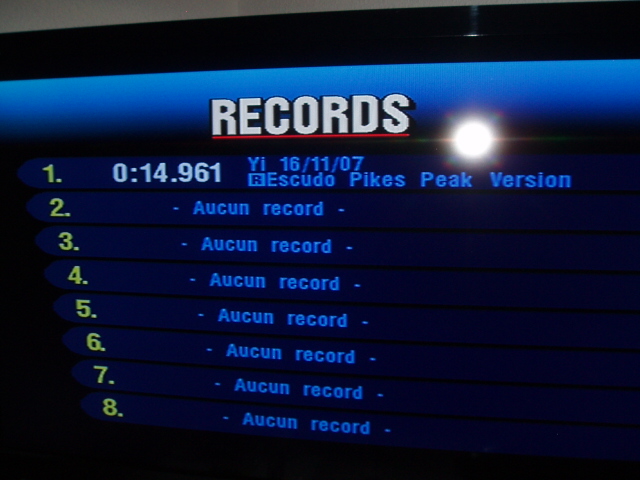
0-1000 m
Score: 14961
Rank: 3
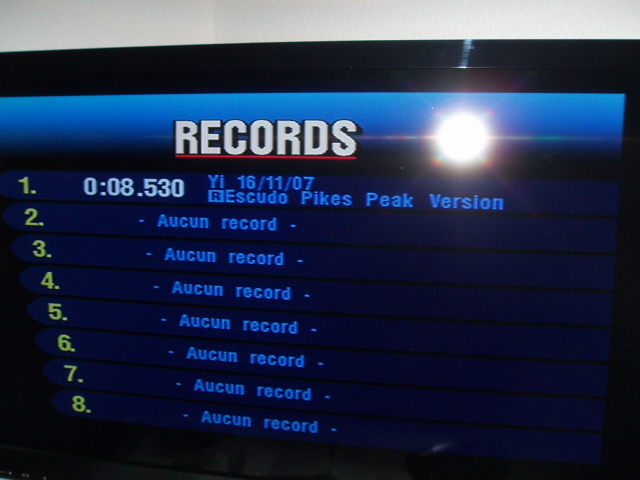
0-400 m
Score: 8530
Rank: 7
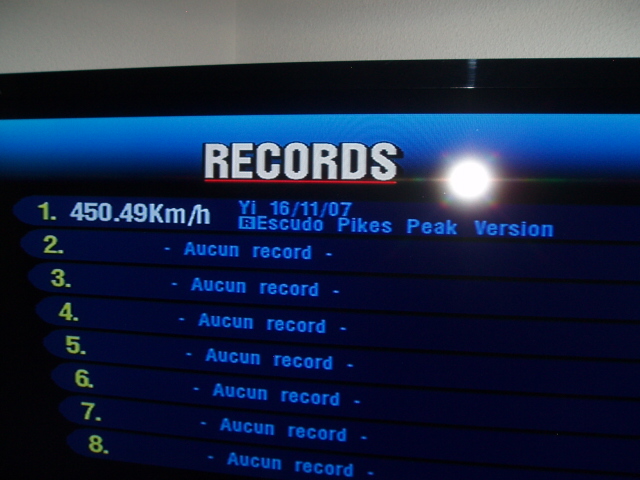
Max Speed
Score: 45049
Rank: 3
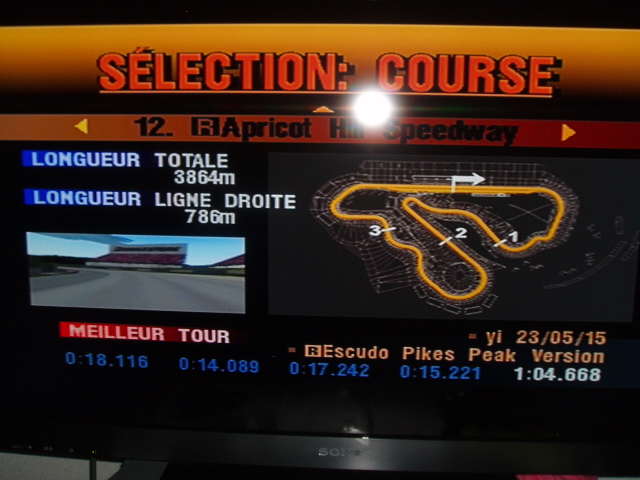
Apricot Hill Speedway
Score: 102627
Rank: 3

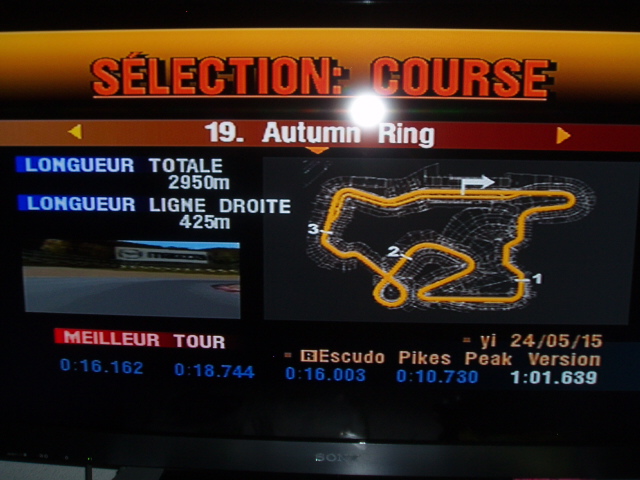
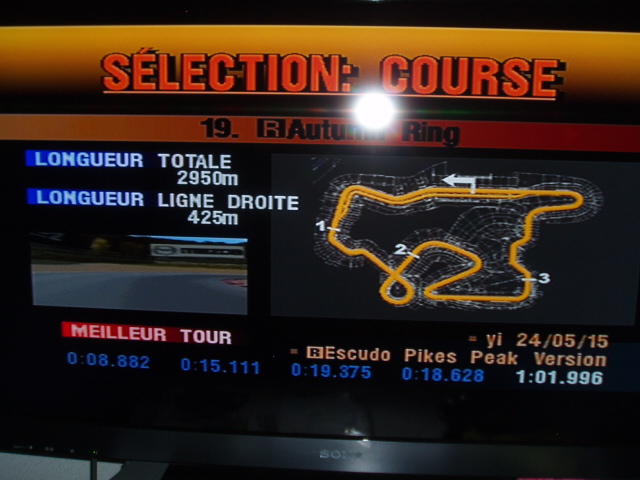
Autumn Ring
Score: 101639
Rank: 5
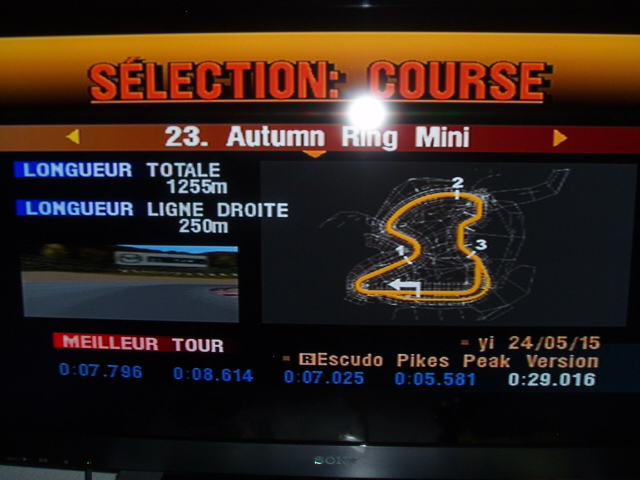
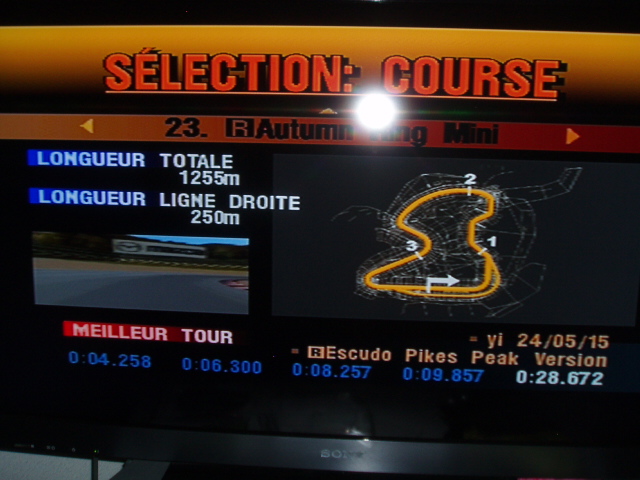
Autumn Ring Mini
Score: 29016
Rank: 5
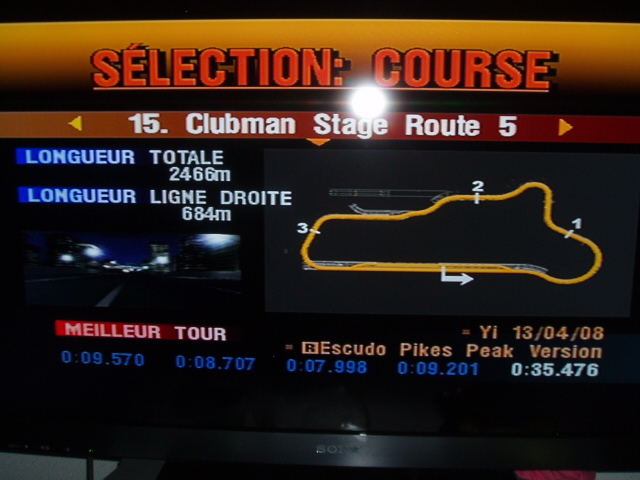
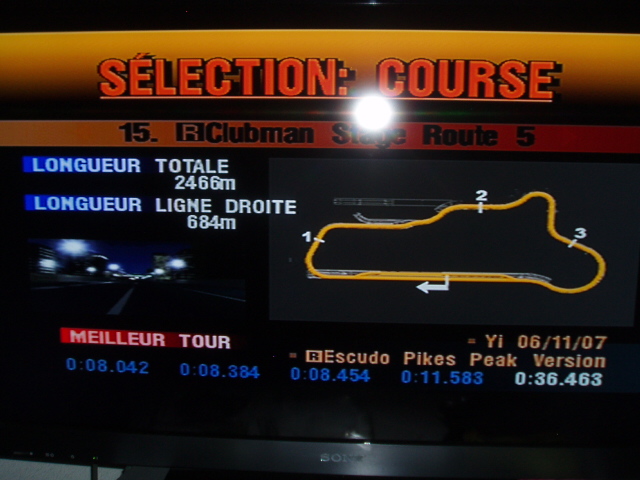
Clubman Stage Route 5
Score: 35476
Rank: 2
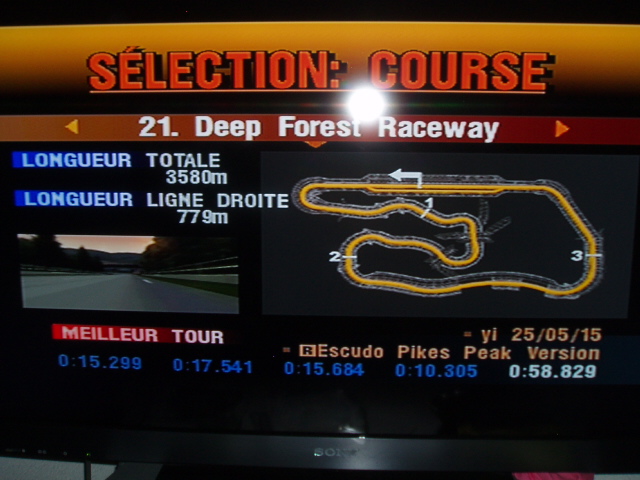
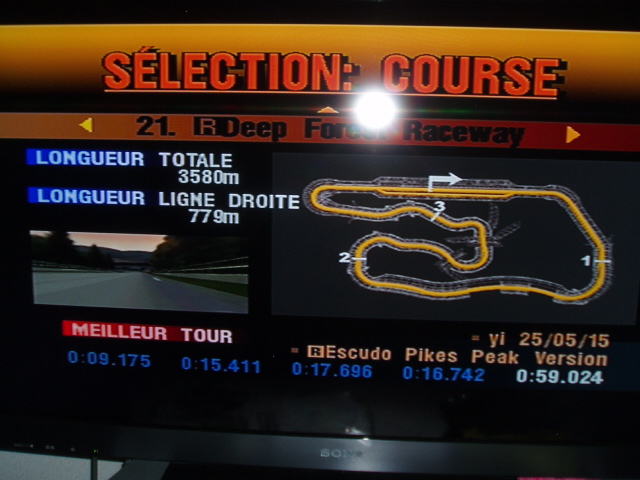
Deep Forest Raceway
Score: 58829
Rank: 5
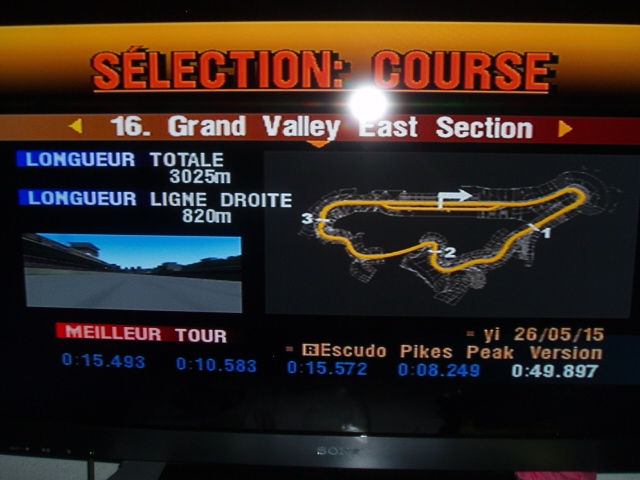
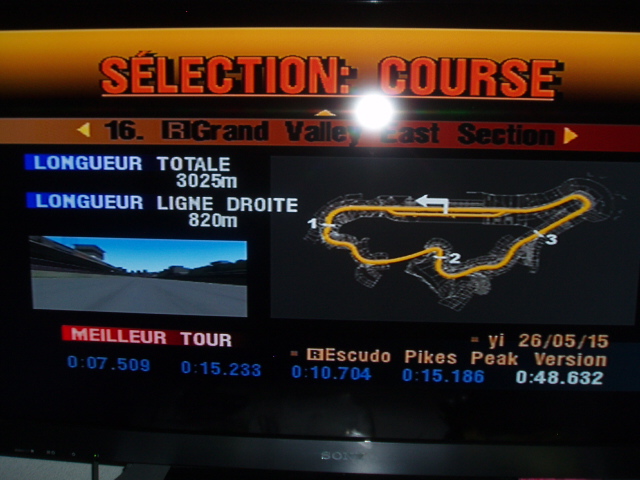
Grand Valley East Section
Score: 49897
Rank: 5
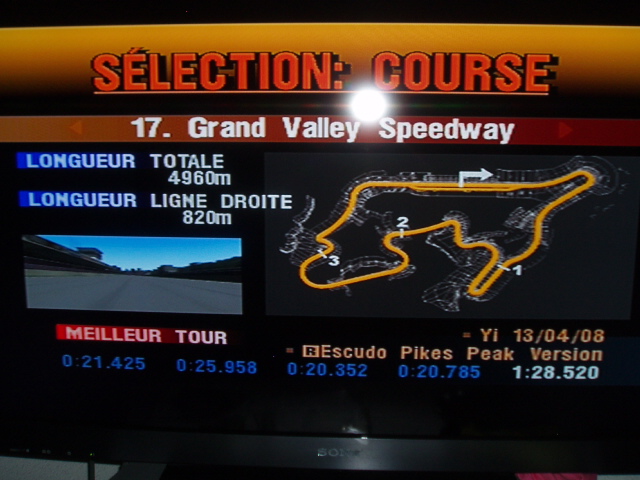
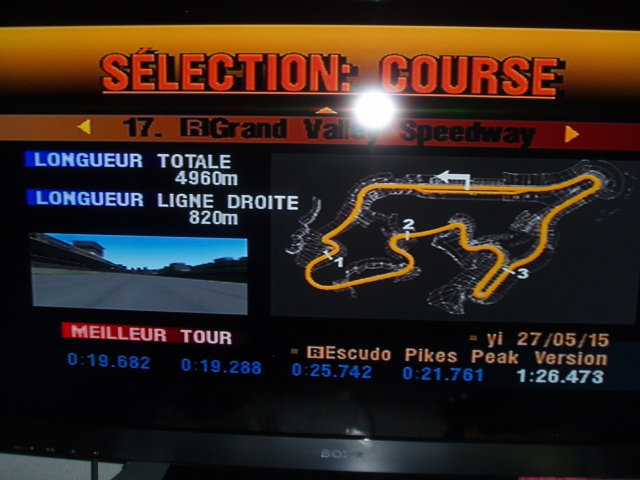
Grand Valley Speedway
Score: 128520
Rank: 4
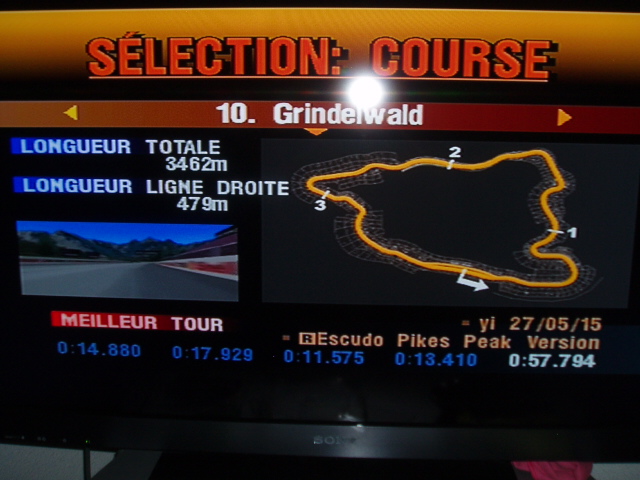
Grindelwald
Score: 57794
Rank: 3
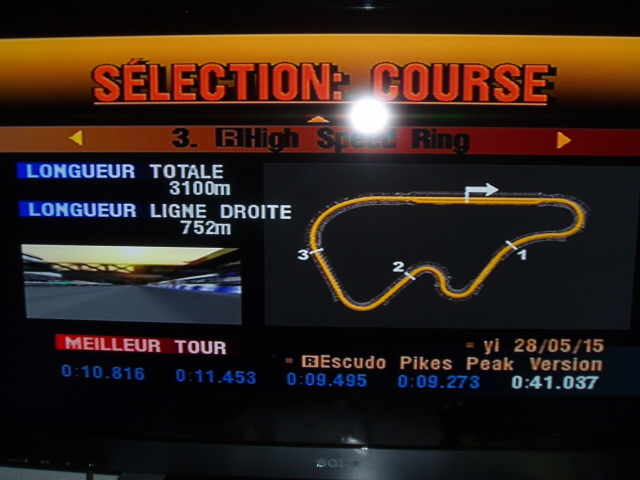
High Speed Ring
Score: 38963
Rank: 3

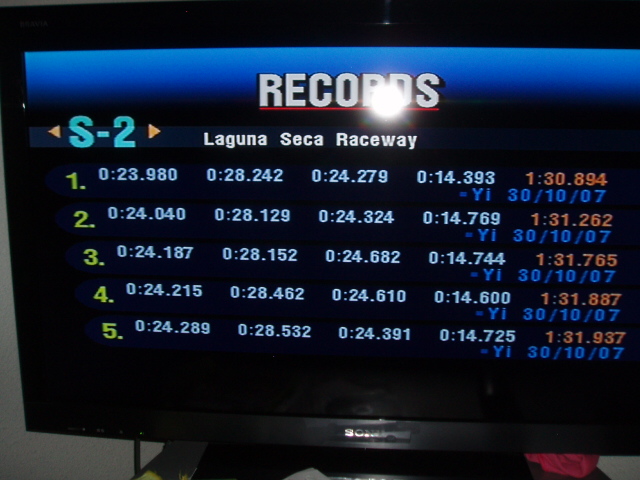
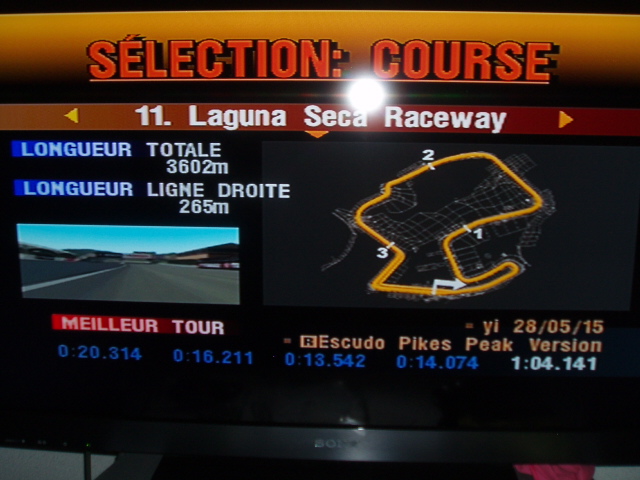
Laguna Seca Raceway
Score: 104141
Rank: 5
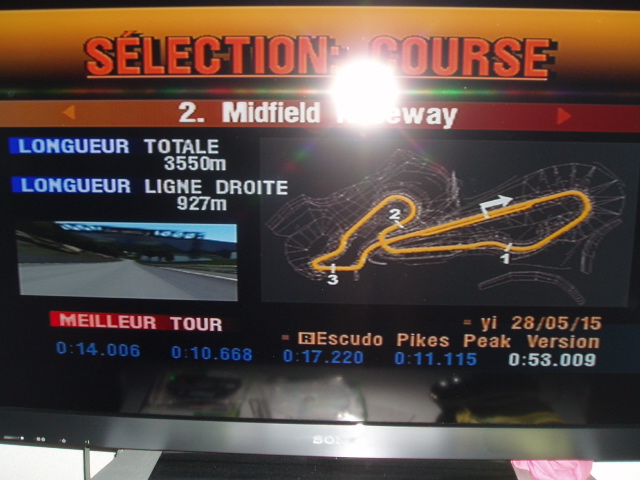
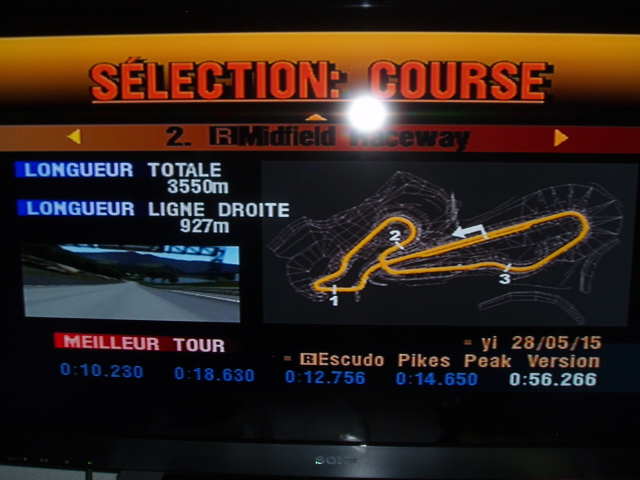
Midfield Raceway
Score: 53009
Rank: 4
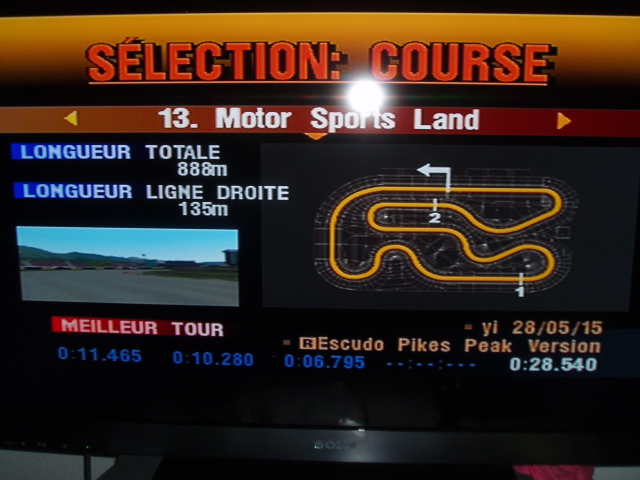
Motor Sports Land
Score: 28540
Rank: 4
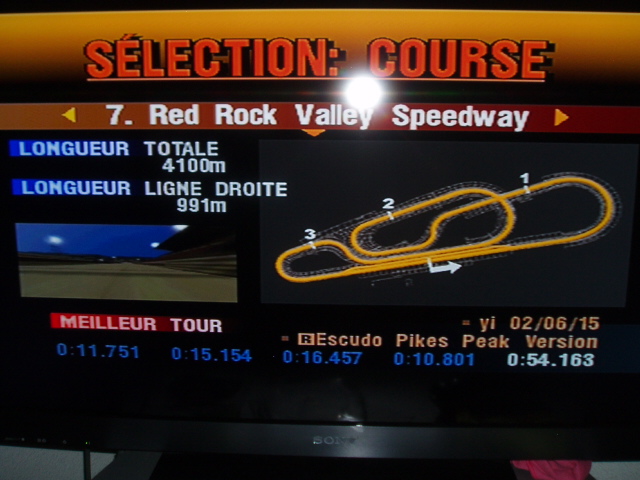
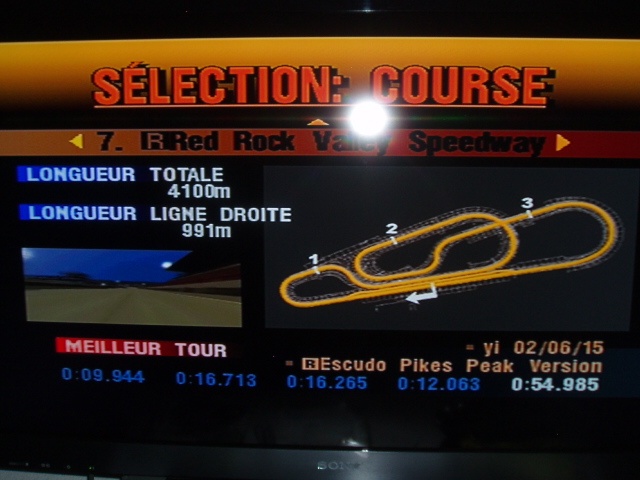
Red Rock Valley Speedway
Score: 54163
Rank: 3
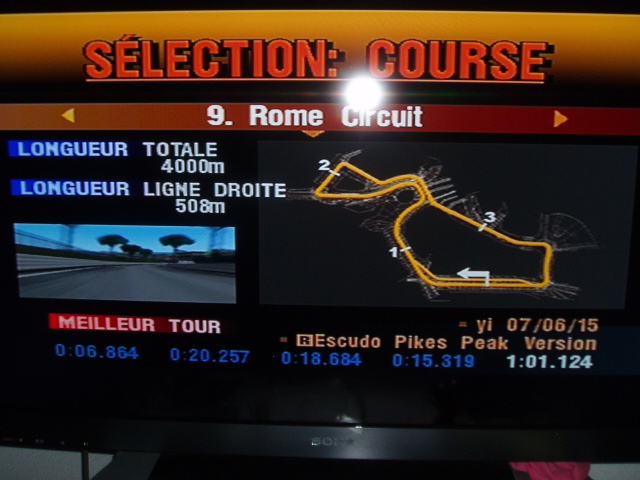
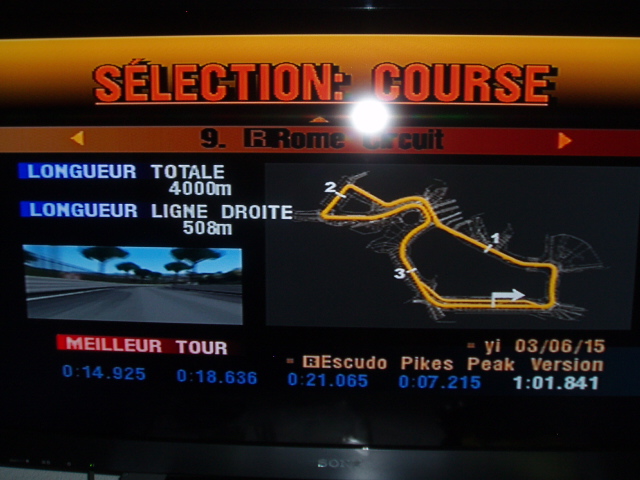
Rome Circuit
Score: 101124
Rank: 5
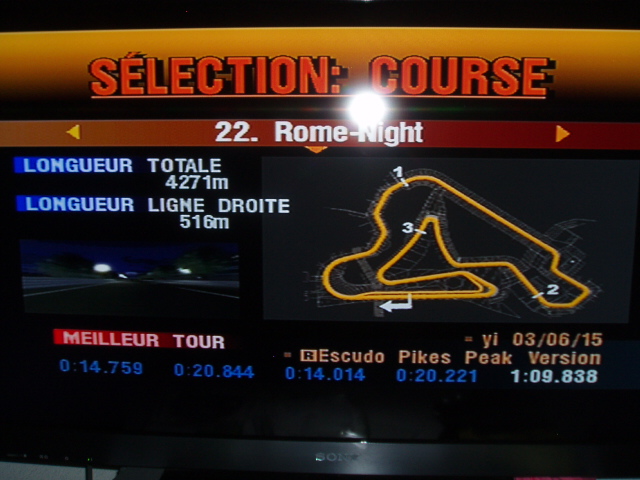
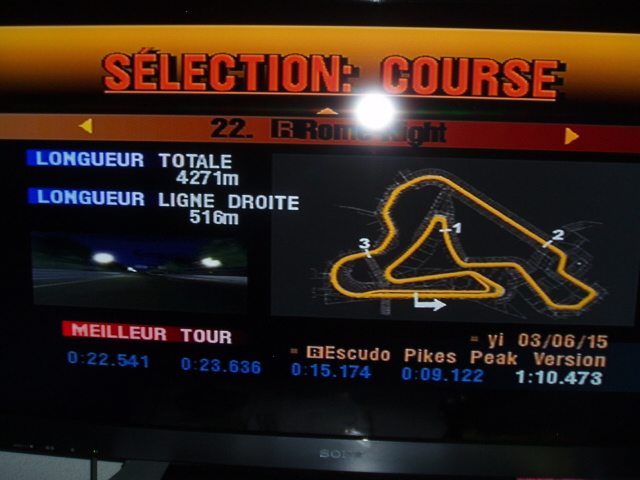
Rome Night
Score: 109838
Rank: 2
Rome Short Course
Score: 31907
Rank: 2

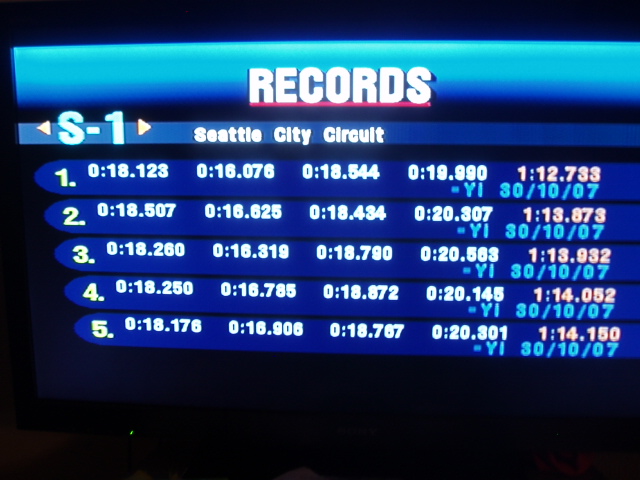
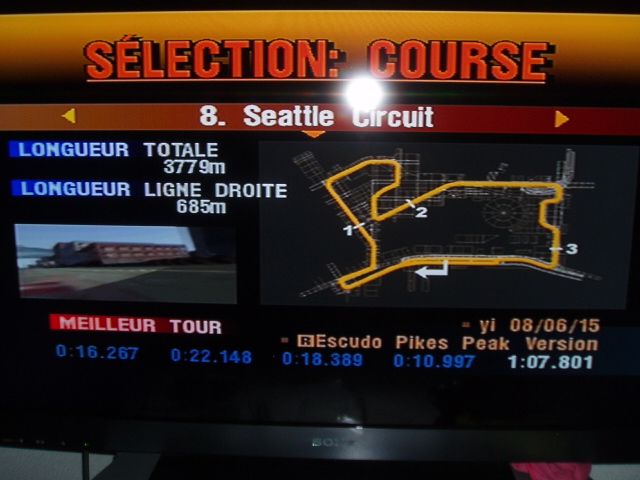
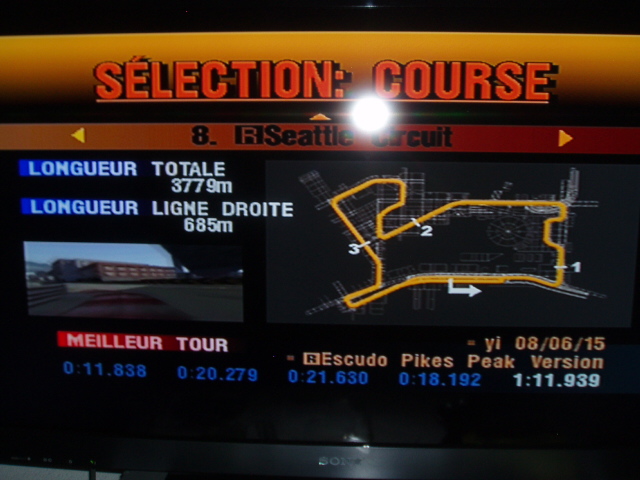
Seattle Circuit
Score: 107801
Rank: 2
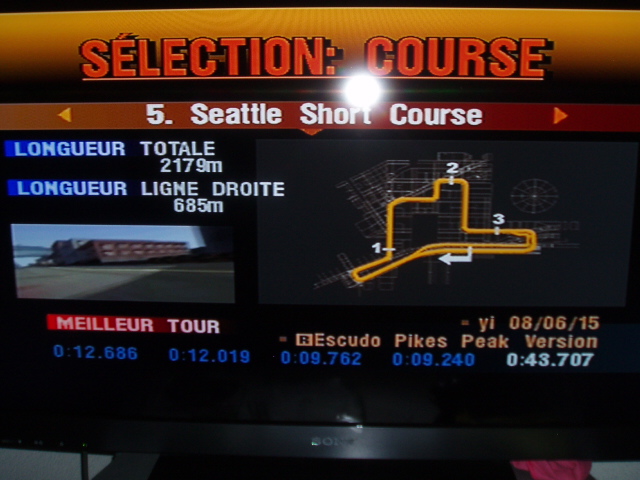
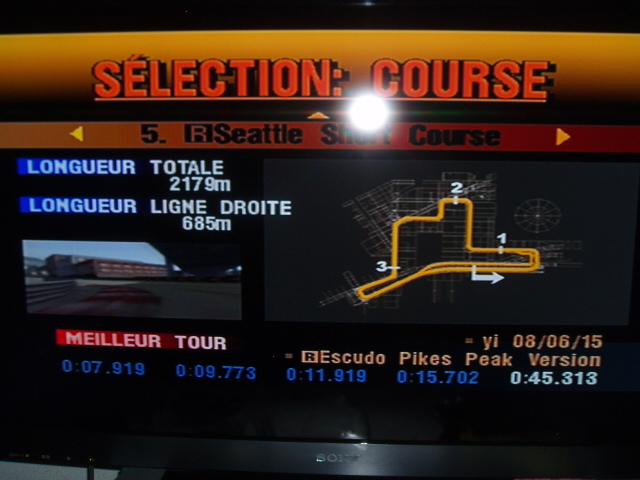
Seattle Short Course
Score: 43707
Rank: 3
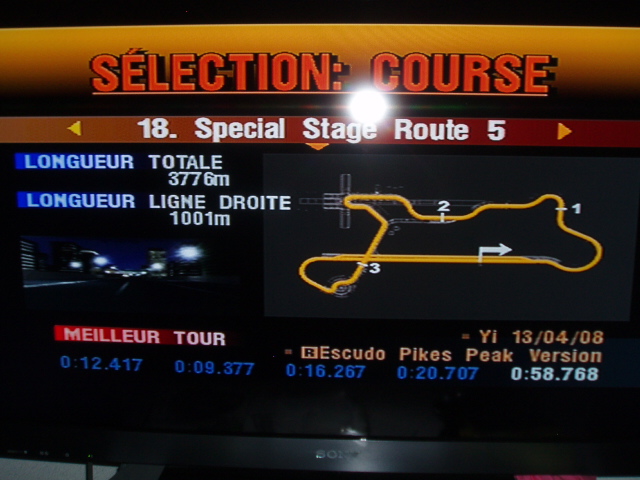
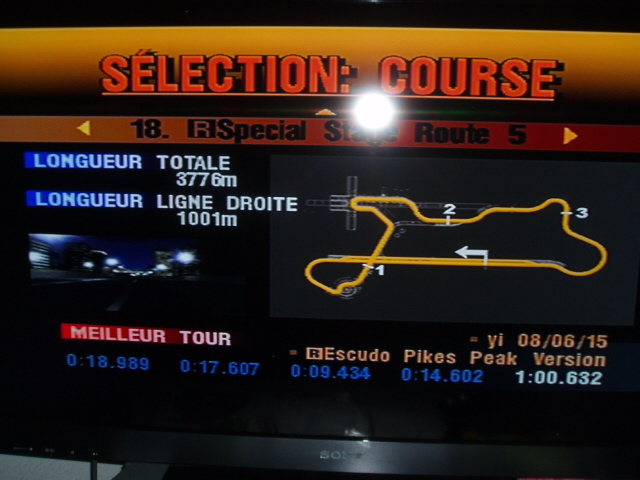
Special Stage Route 5
Score: 58768
Rank: 2
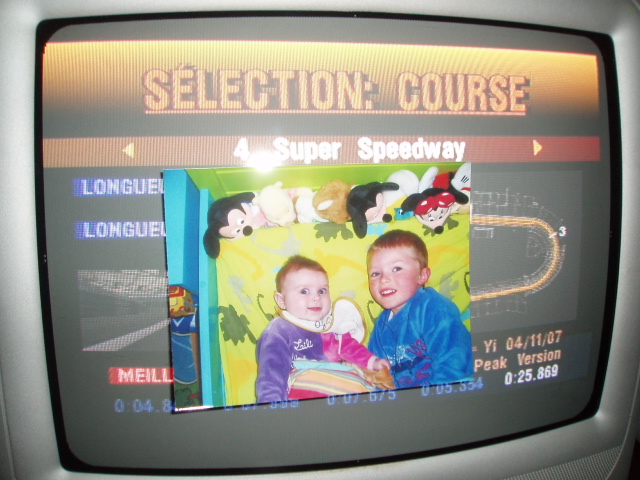
Super Speedway
Score: 25869
Rank: 8
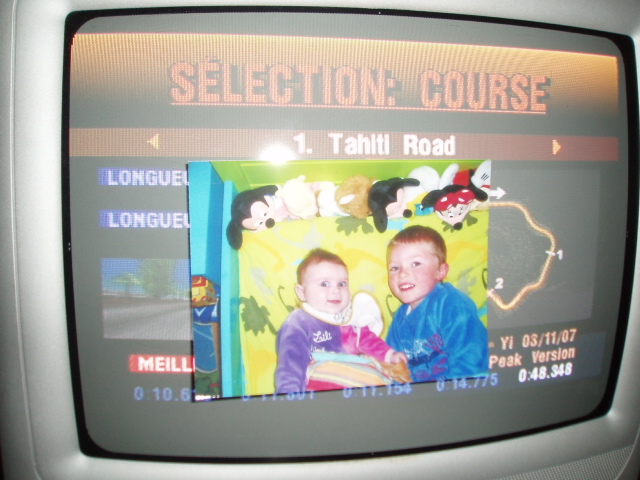
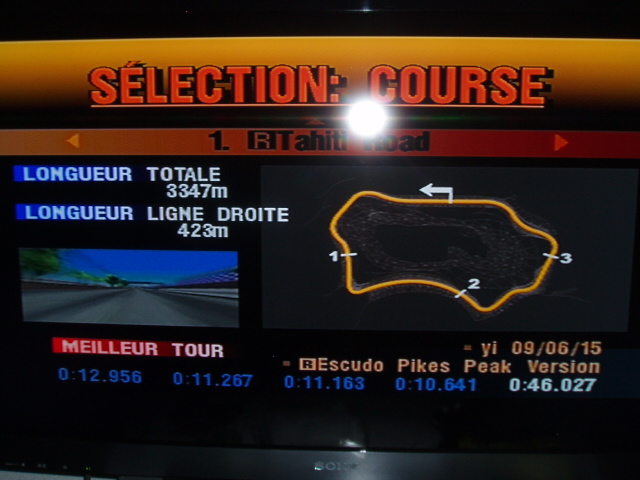
Tahiti Road
Score: 48348
Rank: 7
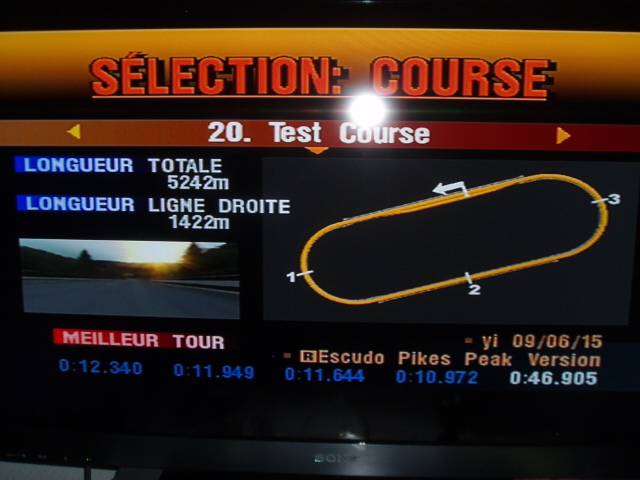
Test Course
Score: 46905
Rank: 7
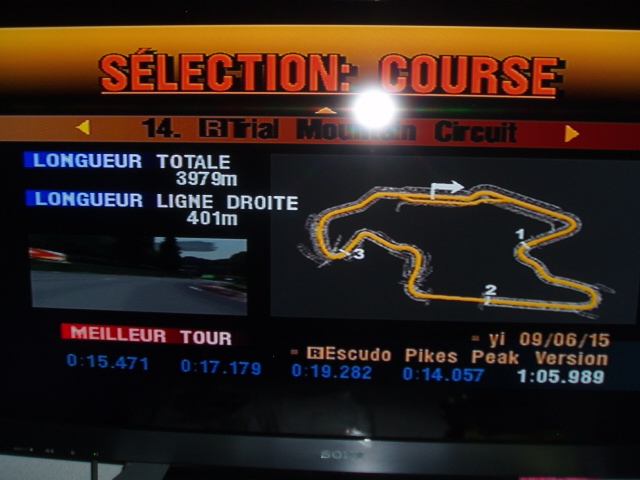
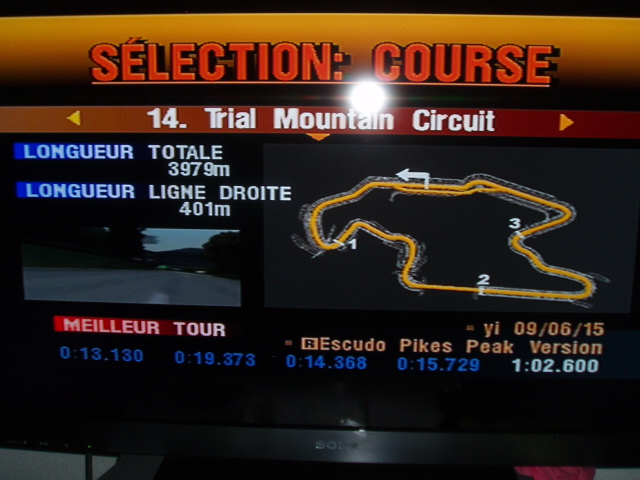
Trial Mountain Circuit
Score: 102600
Rank: 2
Apricot Hill Speedway
Score: 104668
Rank: 3
Autumn Ring
Score: 101996
Rank: 3
Autumn Ring Mini
Score: 28672
Rank: 3
Clubman Stage Route 5
Score: 36463
Rank: 3
Deep Forest Raceway
Score: 59024
Rank: 3
Grand Valley East Section
Score: 48632
Rank: 3
Grand Valley Speedway
Score: 126473
Rank: 3
Grindelwald
Score: 57652
Rank: 2
High Speed Ring
Score: 41037
Rank: 3
Midfield Raceway
Score: 56266
Rank: 3
Red Rock Valley Speedway
Score: 54985
Rank: 3
Rome Circuit
Score: 101841
Rank: 3
Rome Night
Score: 110473
Rank: 2
Rome Short Course
Score: 35389
Rank: 4
Seattle Circuit
Score: 111939
Rank: 1
Seattle Short Course
Score: 45313
Rank: 3
Special Stage Route 5
Score: 100632
Rank: 3
Tahiti Road
Score: 46027
Rank: 2
Trial Mountain Circuit
Score: 105989
Rank: 2